Excel is an essential tool for managing and analyzing data, but it can be frustrating when it automatically changes numbers into dates. This problem can cause errors in calculations and make it difficult to work with your data. Fortunately, there are several ways to stop Excel from automatically changing numbers to dates. In this guide, we’ll explore different methods for disabling this feature, so you can keep your data accurate and avoid the headaches of incorrect formatting. Whether you’re a beginner or an experienced Excel user, these tips will help you master this common problem and work more efficiently with your data.
Microsoft Excel’s features make entering dates easier. 3/13, for example, becomes 13 Mar. When we input something that we don’t want to convert into a date. Unfortunately, there is no way to prevent this from occurring. There are however workarounds accessible. This post will outline five distinct strategies for preventing Excel from converting numbers to dates.
This Tutorial Covers:
- By using the format cells feature, you may stop Excel from changing your numbers to dates
- Stop Excel from Converting Numbers to Dates Using an Apostrophe
- To prevent Excel from converting numbers to dates, add space
- Insert a zero and a space to stop the automatic conversion of numbers to dates
- To prevent automatic conversion, use Excel VBA
- By using the format cells feature, you may stop Excel from changing your numbers to dates:
We can alter the visual representation of cell numbers using the format cells features without altering the actual number. We are aware that 0.375 is a fraction, and its value is 3/8. Therefore, we type the number into the chosen cell.
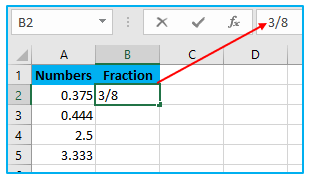
Once you press Enter, it will automatically change to dates (see the screenshot below).
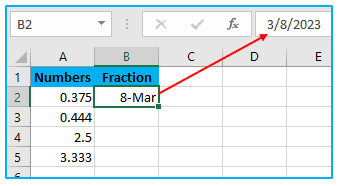
When entering fractional numbers or numbers that contain the symbols “/” or “-,” this will occur for each and every cell.
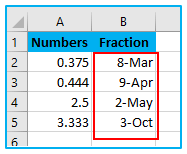
We’ll utilize text formatting to prevent Excel from converting numbers to dates.
The steps to prevent converting numbers to dates in Excel are described below:
Step 1:Choose the cells into which you will type the fractional numbers.
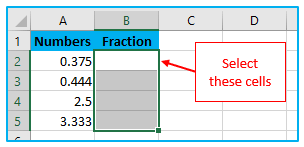
Step 2: Select the Ribbon and navigate to the “Home” tab.
Launch the “Format Cells” dialog box by clicking on the small icon in the “Number” group.
As an alternative, you can open the Format Cells window by pressing Ctrl + 1.

Step 3: The “Format Cells” dialog box will consequently show up. Next, choose “Text” from the “Number” menu. To further close the dialog, click the OK button.
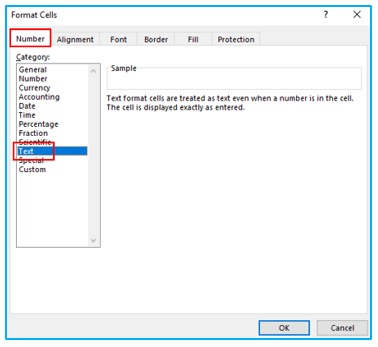
Step 4: Now, this won’t alter if you enter any fractional amount.
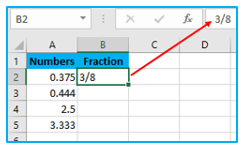
Finally, putting any fractional number into the cells that have been chosen only halts the transition from numbers to dates automatically.
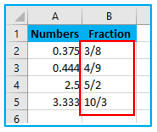
Note: We must change the format before inputting the number. If we do this after entering the number, the format will switch to text, but we won’t get the exact number or text string we entered; instead, we’ll just get the date’s numeric value.
2. Stop Excel from Converting Numbers to Dates Using an Apostrophe:
The use of the apostrophe is the greatest method to guarantee that numbers seem the same after being typed. In this way, a cell won’t be automatically formatted if the formatting is changed back to General and it is updated; instead, it will keep its former appearance.
So, let’s look at the steps that lead down:
Step 1: Select the cell where you wish to enter the fraction number first.
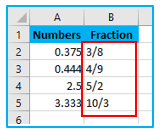
After that, put an apostrophe before the number. Enter the key.
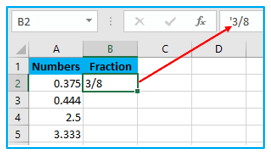
The apostrophe won’t appear in the cell, but it will be visible in the formula bar.
All done! You can do this for every cell range, and by adding an apostrophe, Excel won’t change the format.
3. To prevent Excel from converting numbers to dates, add space:
By including a space before inputting a number, we can stop Excel from converting the numbers to dates.
Let’s add space by doing the things listed:
Step 1: Prior to entering the fractional number, select the cell.
Use a space before the number after that. Press Enter. In the cell, the gap is still visible.
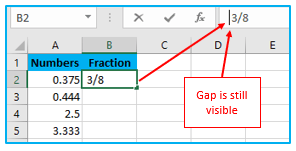
That’s it. This works for all cell ranges, and Excel won’t modify the format if you add a space.
4. Insert a zero and a space to stop the automatic conversion of numbers to dates:
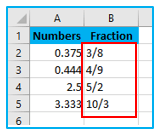
Make sure to include a 0 and space before inputting a fraction, such as 3/8, to avoid it turning numbers to dates.
Let’s proceed down the steps:
Step 1: Choose the cell in which you want to enter the fractional number first.
Add a 0 and a space before the number after that.
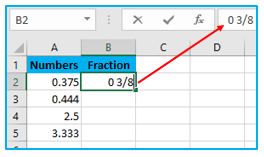
Step 2: After that, hit Enter.
Entering removes the zero from the cell and converts it to a fraction number type.
If you look at the formula bar, it will display the fraction’s decimal number.
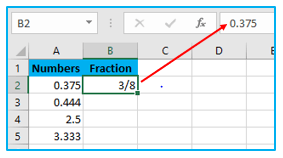
This method has a drawback in that not all fractions can be calculated using it. For instance, 2.4 is a fraction of 5/2, but since these numbers are divisible, when the zero and space are combined, this gives 2 1/2.
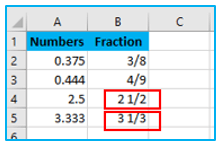
Note: This will function perfectly if you use ‘-‘, but I recommend switching to the other methods instead.
5. To prevent automatic conversion, use Excel VBA
Users of Excel VBA can quickly access the code that serves as an Excel menu from the ribbon.
How to stop Converting Numbers to Dates in Excel automatically using VBA code is shown below:
Step 1: On your keyboard, hit Alt and F11 to launch the “Visual Basic Editor.”
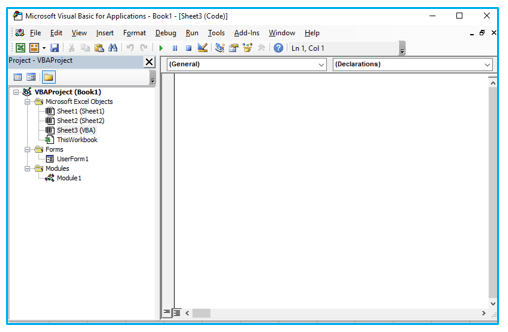
Step 2: The “Visual Basic Editor,” where we write our code, will display this.
From the “Insert” drop-down menu bar, select “Module.”
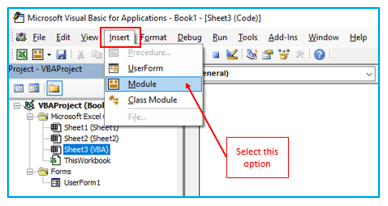
Step 3: Your workbook’s Module will be created as a result. Additionally, copy the VBA code below, then paste it.
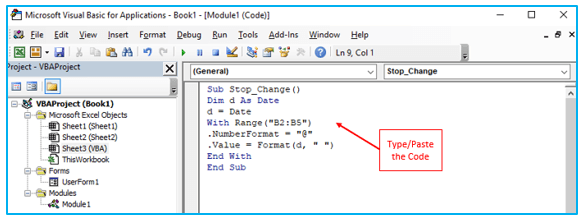
Step 4: Run the code after that by pressing the F5 keyboard shortcut or the RubSub button.
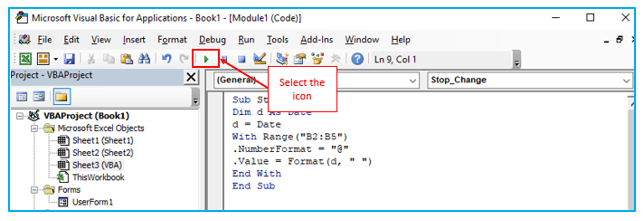
Note: The code does not require modification. Simply changing the range to suit your needs is all that is possible.
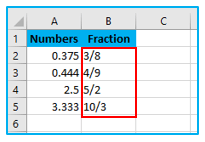
Finally, there will no change happen if you enter a number followed by a slash or a dash.
For ready-to-use Dashboard Templates:
