Sort in Excel by row, column names, and in custom order to revolutionize the way you manage and analyze your data. This powerful functionality allows you to view information from multiple perspectives, enhance your data analysis, and present information in a more structured and understandable manner. Whether you’re preparing for presentations, reports, or simply trying to make sense of large datasets, mastering sorting techniques in Excel will enable you to quickly arrange data in the most useful way. Embrace the full potential of Excel sorting to streamline your workflow and unlock deeper insights from your data.
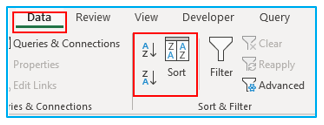
Everyone is aware of how to sort by column in either ascending or descending order. Simply click the A-Z or Z-A buttons found on the “Home” tab in the “Editing” group and the “Data” tab in the “Sort & Filter” group, respectively:
The Excel Sort tool, however, offers a lot more options and capabilities that are less evident but could be very useful.
This Tutorial Covers:
- Using Find and Replace, extract and sort by last name
- Utilizing a formula, extract and alphabetize last names
- By use of Text to Columns
- Employing Flash Fill
- Sort by several columns
- Sort Excel data by row and column names
- Sort in a custom order (by custom list)
- Sort data by your own custom list
- Sorting by color in excel
1. Using Find and Replace, extract and sort by the last name
Getting the last name in a separate column is the first step in sorting by the last name.
To achieve this, simply leave the space preceding the last name blank, leaving only the last name remaining.
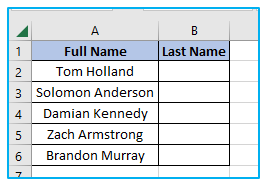
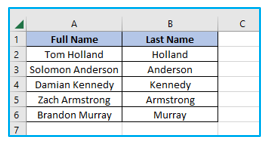
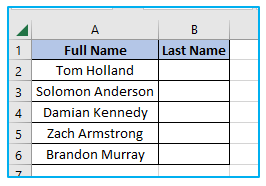
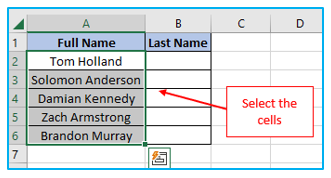
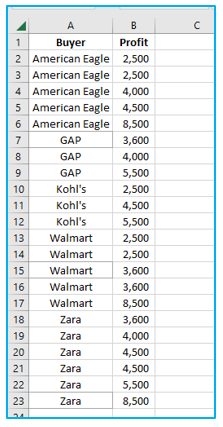
Assume you want to arrange the data in the dataset as shown below alphabetically by last name.
The steps to sort by the last name are as follows:
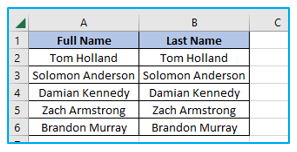
Step 1: The names from Column A should be copied and pasted into Column B.
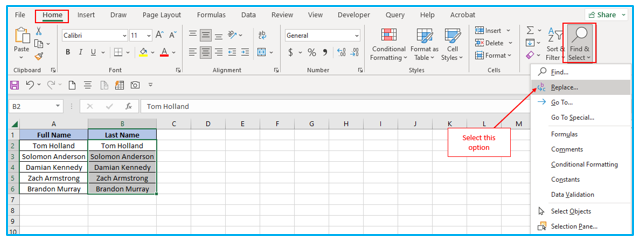
Step 2: Click the “Home” tab after selecting the information in Column B. Press the “Find & Select” button under the “Editing” group. Select “Replace”. The “Find and Replace” dialog box will then be displayed.
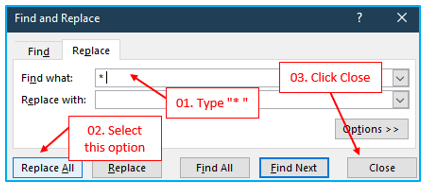
Step 3: Enter the following in the ‘Find and Replace’ dialog box.
- Find what: * (space character followed by the asterisk symbol)
- Replace with: Leave this blank to replace this.
- Simply select “Replace All”. After that click “Close”.
The actions would only delete the first name, leaving only the last name. Even if you have middle names or prefixes, this still works (such as Mr. or Ms.).
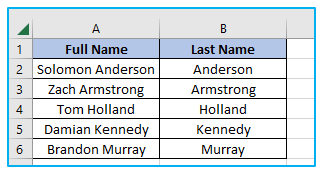
You may quickly sort the dataset (including the full names) alphabetically based on the last name after you have the last names in the adjacent column.
The steps to sort by the last name are as follows:
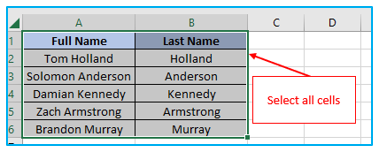
Step 1: The entire dataset with headers should be chosen (including the full names and the extracted last names). Along with the names, you can also enter any columns you want to order.
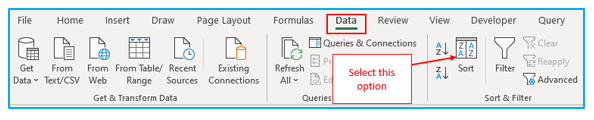
Step 2: On the Data tab, click. Select Sort.

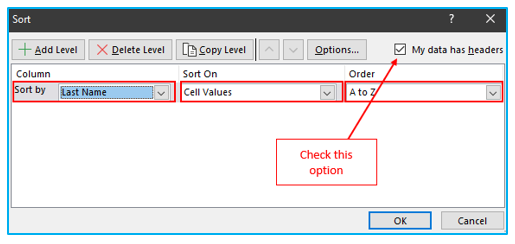
Step 3: Make sure “My data includes headers” is chosen in the Sort dialog box. Choose the name of the column containing only the last name under the “Sort by” heading. Select “Cell Values” under “Sort On”. Pick “A to Z” under the Order option. Select OK.
Based on the last name, the aforementioned stages would order the entire specified dataset.
Pro tip: You should have a way to un-sort this dataset if you ever believe you might need the original data again. To accomplish this, place serial numbers in a column to the left or right of the sorting, adjacent to it. Now, if you need the original data back, sorting by numbers will give it to you.
2. Utilizing a formula, extract and alphabetize last names
Even while I prefer the above method (using Find and Replace to collect all the last names and sort them), it has the drawback of producing static data.
The process will have to be repeated in order to obtain the last names if I add more names to my list.
Use the formula technique to sort the data by last names if you don’t want this to happen.
Assume you possess the dataset depicted below.
The following formula will take the last name out of the complete name:
=RIGHT(A2,LEN(A2)-FIND(” “,A2))
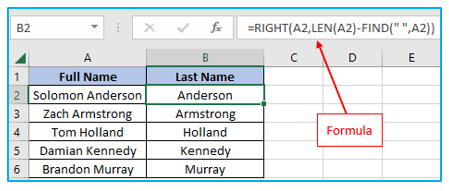
The formula above depends on a pattern with a full name (that contains only the first and last name in this example). The first and last names are typically separated by a space character.
To determine the location of the space character, utilize the FIND function. The total number of characters in the last name is then calculated by subtracting this value from the length of the name as a whole.
The RIGHT function uses this value to obtain the last name after that.
You can order this information once you have the last name column (this is covered in the first method in detail).
If you simply have first and last names, the formula above would still be valid.
What if you also have a middle name, though? sometimes a salutation comes before the name (such as Mr. or Ms.)
In this situation, you must apply the following formula:
=RIGHT(A2,LEN(A2)-FIND(“@”,SUBSTITUTE(A2,” “,”@”,LEN(A2)-LEN(SUBSTITUTE(A2,” “,””)))))

The last space character is located using the algorithm above, which is then used to derive the last name.
The second formula is the one I advise using in all circumstances because it is more reliable and can handle any situation (as long as the last name is at the end of the name).
It should be noted that these two algorithms assume there is only one space character between each name element. This formula will produce false results if there are leading or trailing spaces, or if there are multiple spaces. In this situation, it is recommended to first remove any leading, trailing, and double spaces using the TRIM function before applying the aforementioned formula.
Using a formula has the advantage of making the outcomes dynamic, despite the fact that it may look like a complex procedure. If you want to get the last name for other names on your list, just copy the formula.
3. By use of Text to Columns
Once more, using Text to Columns in Excel to divide cells is quick and easy.
To divide the content of the cell, you can specify the delimiter (such as a comma or space). Once the split items are in separate columns, you can alphabetize the data using the column containing the last name.
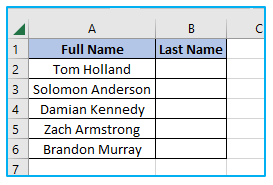
Assume you have the dataset as follows:
The procedures for using Text to Column to sort by last name are as follows:
Step 1: Choose every name in the column (A2:A6 in this example)
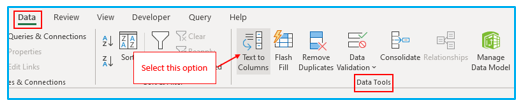
Step 2: Toggle to the “Data” tab. Select the “Text to Columns” option under the “Data Tools” group.
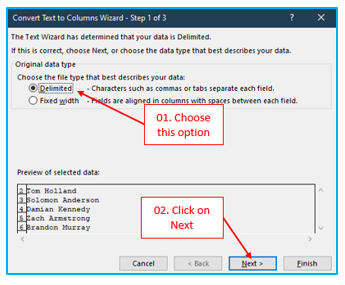
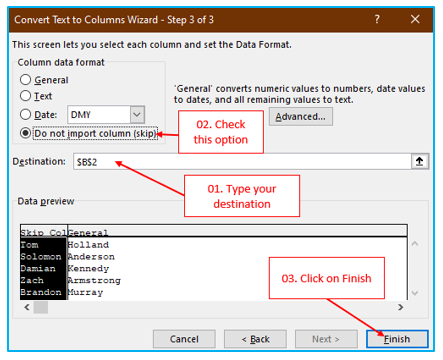
Step 3: The “Convert Text to Column Wizard” dialog box will appear. Click “Next” after choosing “Delimited” (which enables you to use a space as the separator).
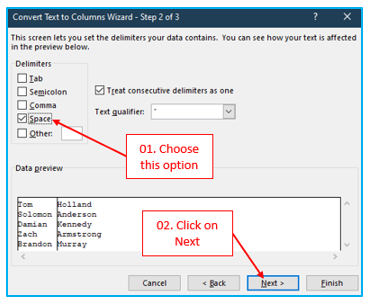
Step 4: Click “Next” after selecting the “Space” option.
Step 5: Make B2 the final destination cell (else it will overwrite the existing data). ‘Do not import columns (skip)’ should be chosen. This makes sure that only the last name is returned and that the first name is excluded. After that, select “Finish”.
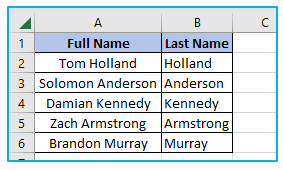
Following the procedures above would immediately separate the names into last names.
When using a comma as the separator, you can also use Text to Columns to separate first and last names.
4. Employing Flash Fill
Using the Flash Fill tool is another quick and easy approach to retrieving the last names.
In Excel 2013, Flash Fill was added, and it aids in data manipulation by spotting patterns. You must repeatedly display to Flash Fill the outcome you desire for this to succeed.
It will finish the remainder of the work for you shortly after determining the pattern.
Let’s say you have the names dataset listed below.
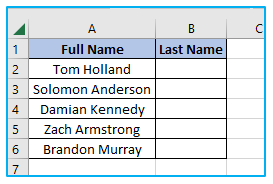
The procedures for using Flash Fill to obtain the last name and then sort using it are listed below:
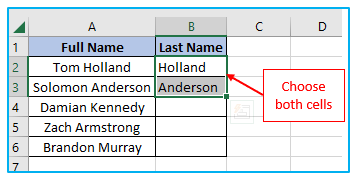
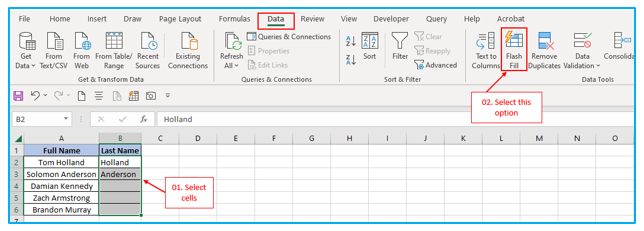
Step 1: In cell B2, type “Holland” in the text field. You anticipate this outcome in the cell. Enter the last name for the name in the next cell in the following cell (Anderson in this example). Choose both cells.
Step 2: Select the cells of column B where you want to put first name. Go to “Data” tab, then select “Flash Fill” option under “Data Tools” group.
The results of Flash Fill would be provided by the processes above (based on the pattern it has deduced).
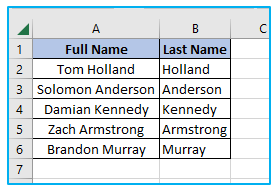
The outcome you get from this will probably be the last names in each cell.
Though Flash Fill might not always function, I say “likely.” It might not always be able to do that because it depends on being able to recognize a pattern. Or occasionally, the pattern it discerns might not be the correct one.
You can sort the data based on last names once you have a column with all the last names in it.
5. Sort by several columns
I’ll now demonstrate how to order Excel data by two or more columns. Excel 2021 will be used because I already have this version of the program installed on my machine. You won’t have any trouble following the examples if you use a different version of Excel because Excel 2007 and Excel 2013 have essentially identical sorting features. Only minor variations in color palettes and dialog layouts might be apparent. Okay, let’s move forward.
Step 1: Select your entire dataset.
Step 2: To enter the Sort dialog, click the Sort button on the Data tab or Custom Sort on the Home tab.

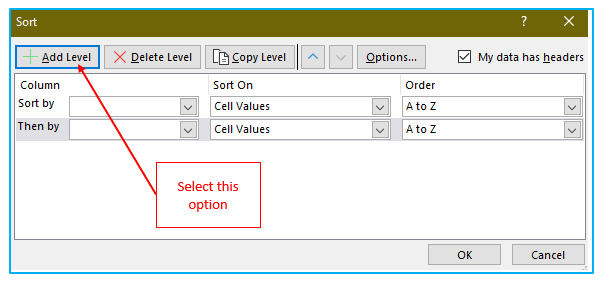
Step 3: After that, select how many columns you want to utilize for sorting by clicking the Add Level button numerous times:
Step 4: Pick the columns you want to use to sort your data from the “Sort by” and “Then by” dropdown options. You can also choose order.

Step 5: Once you click OK, you will see:
Excel makes it rather simple to sort data by several columns, don’t you think? The Sort dialog, however, provides a ton of additional features. In the sections that follow, I’ll demonstrate how to sort by row rather than column and how to rearrange the data in your spreadsheet in alphabetical order depending on the names of the columns. Additionally, you will discover alternative methods for organizing Excel data when alphabetical or numerical order is ineffective.
6. Sort Excel data by row and column names
90% of the time when you sort data in Excel, you do so based on values from one or more columns. To sort by row (horizontally), or to reorder the columns from left to right based on the column headers or values in a certain row, is necessary when dealing with non-trivial data sets.
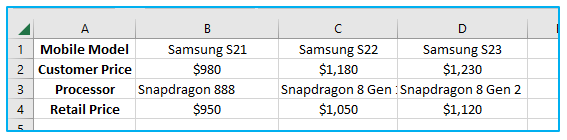
For instance, a local seller gave you a list of mobile phone models. The list’s prices are listed as follows:
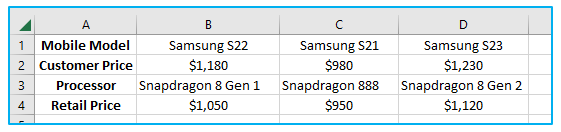
What you need to do is sort the mobile according to the factors that are most important to you. Let’s sort them by the model as an example.
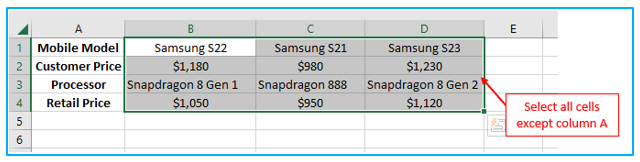
Step 1: Choose the data range you want to sort. Simply choose any cell within your range if you wish to rearrange all the columns. Because Column A lists several features and we want it to stay in place, we are unable to achieve this for our data. Thus, cell B1 is where we start our selection:
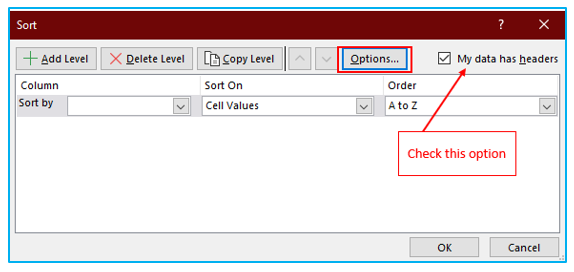
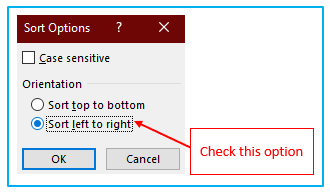
Step 2: To access the Sort dialog, click the Sort button on the Data tab. If your worksheet doesn’t contain headers, uncheck the “My data has headers” checkbox in the dialog’s upper-right corner. We leave the ticked box because our document includes headers and click the Options button.
Step 3: Select Sort left to right in the Orientation section of the initial Sort Options window and then click OK.
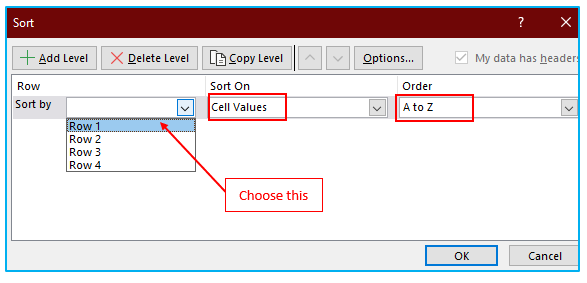
Step 4: Then decide which row you wish to sort by. In this example, we choose Row 1, which contains the names of the photo cameras. Select “Cell Values” for the Sort on option and “A to Z” for the Order option before clicking OK.
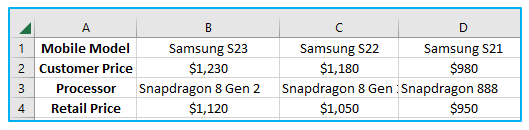
Your sorting should produce something that resembles this:
The situation, sorting by column names makes very little sense practically, but we did it nonetheless to show you how it works. The list of mobiles can be sorted according to the processor, and price that is important to you. For starters, let’s arrange them according to pricing.
Following the procedure outlined above for steps 1 through 3, choose Row 4 on step 4 instead of Row 1, which lists retail pricing and set order “Largest to Smallest”. The outcome of sorting will resemble this:
Please be aware that multiple rows have been sorted. To prevent data distortion, the full columns were shifted. In other words, the list of photo cameras you see in the screenshot above is arranged from least expensive to most expensive.
We now have a better understanding of how Excel’s row-sorting function operates. What happens, though, if our data does not arrange correctly either numerically or alphabetically?
7. Sort in custom order (by custom list)
You can utilize the pre-built Excel custom lists or make your own if you wish to organize your data differently than alphabetically. You can sort by days of the week or months of the year using built-in custom lists. These custom lists can be created in Excel in two different ways: with full names and shortened names.
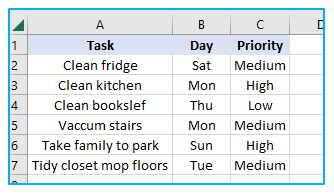
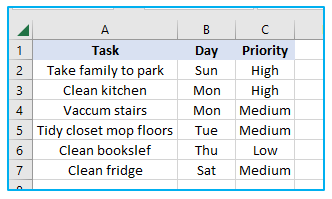
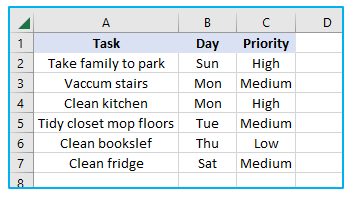
Let’s say we wish to prioritize or order a list of weekly home tasks based on their due date.
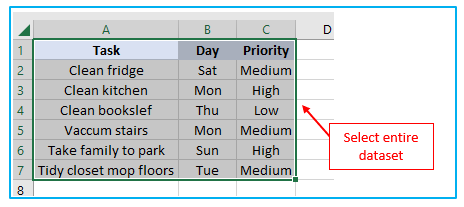
Step 1: Select the entire dataset.
Step 2: To enter the Sort dialog, click the Sort button on the Data tab or Custom Sort on the Home tab.

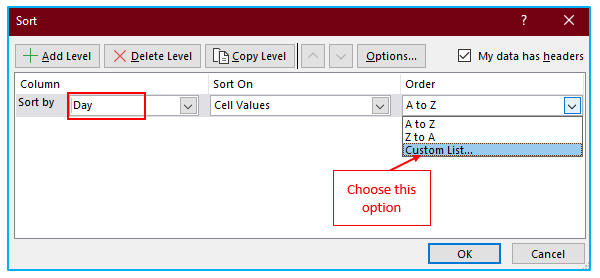
Step 3: Choose the column you wish to sort by in the Sort by box; in our case, we choose the “Day” column since we want to arrange our chores according to the days of the week. Afterward, select Custom List from the Order menu, as seen in the screenshot:
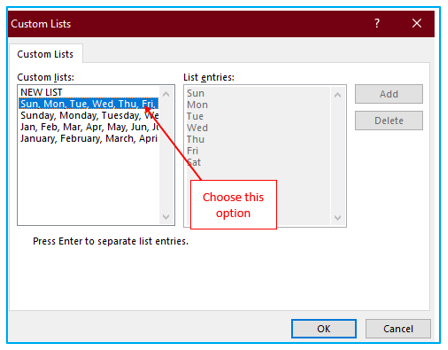
Step 4: Pick the required list from the Custom Lists dialog box. We select the appropriate custom list and click OK because the Day columns contain the abbreviated day names.
All done! Now that we’ve arranged our domestic duties by the days of the week:
As you can see, sorting Excel data with a custom list is also not difficult. We must now sort the data using a custom list that we have created.
8. Sort data by your own custom list
As you may recall, the table also has a column called Priority. You do the following to organize your weekly errands from most important to least important.
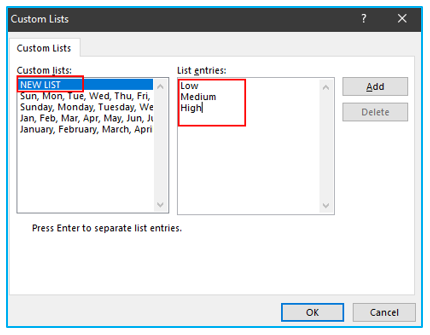
After completing the aforementioned steps 1 and 2, open the Custom Lists dialog. Select the NEW LIST option under Custom Lists in the left-hand column, and then type the items into the List entries box on the right. Keep in mind to type your entries top to bottom, exactly in the order you want them to be sorted:
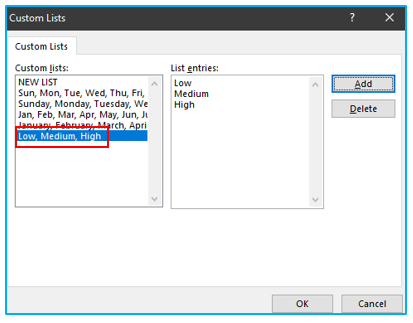
The newly generated custom list will be added to the already existing custom lists when you click Add, then click OK:
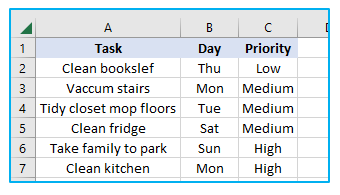
Here are our household chores in order of priority:
You have the option to sort by several columns and use a separate custom list each time you utilize custom lists for sorting. When sorting by many columns, the procedure is precisely the same as what we have just covered.
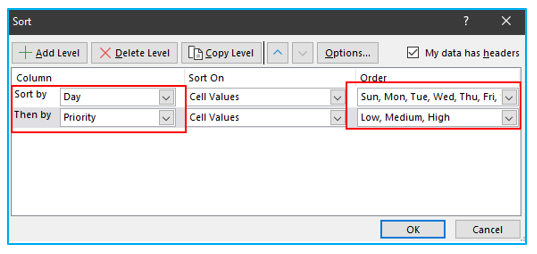
Finally, we have our weekly household duties arranged in the most logical order, first by the day of the week and then by priority.
9. Sorting by color in excel:
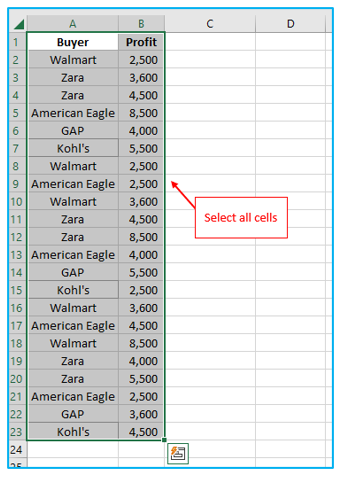
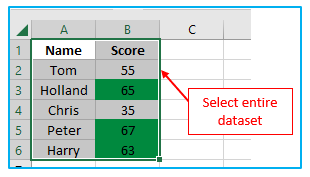
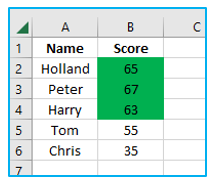
The students who scored more than 80 have all been marked in green in the dataset below.

The following are the steps to sort the cells by their color:
Procedure of sorting by color in excel:
Step 1: Choosing the full collection (A1:B6 in this example)
Step 2: On the “Data” tab, click. Select “Sort” from the menu. The “Sort” dialog box will then be displayed.
Step 3: Make sure “My Data contains headers” is chosen in the Sort dialog box. You can leave this option unchecked if your data doesn’t include headers.
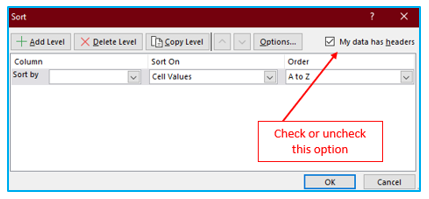
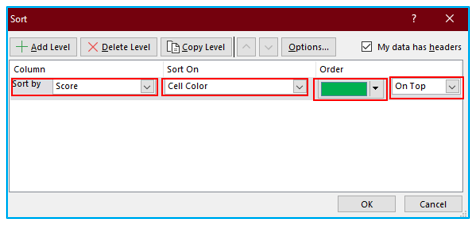
Step 4: Marks can be sorted by clicking the ‘Sort By’ drop-down menu. This is the column that we wish to use to sort the data. Then go to the ‘Sort On’ drop-down menu and select Cell Color.
After that, pick the color you want to use to sort the data in the ‘Order’ drop-down. Our dataset only contains one color, so it only displays that color.
Choose On-top from the second drop-down menu under Order. You can select here whether you want all the colored cells to be at the top or bottom of the dataset.
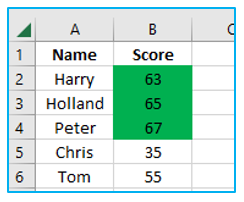
After clicking OK, you would receive the dataset displayed below if you followed the instructions above.
Now you can also sort the score by “Smallest to Largest”. These steps already mentioned above section.
Application of Sort in Excel by row, column names, and in custom order
- Organizing Data Alphabetically or Numerically: Sort data by row or column names to organize names, addresses, or other information alphabetically, or financial figures numerically, enhancing readability and analysis.
- Rearranging Sales or Performance Metrics: Use sorting by columns to rank employees, sales regions, or products based on performance metrics, aiding in quick comparison and decision-making.
- Custom List Sorting: Apply custom sort orders in Excel, such as days of the week or priority levels, to view data in an order that standard alphabetical or numerical sorting doesn’t allow.
- Data Segmentation and Filtering: Sort data to group similar items together by rows or columns, facilitating easier data segmentation and more effective filtering for detailed analysis.
- Time-Series Data Organization: Arrange time-series data like monthly sales or daily temperatures in ascending or descending order to analyze trends over time.
- Preparing Data for Reports and Presentations: Sort data by specific rows or columns to prepare and format information in a logical order, ensuring clarity and impact in reports and presentations.
You may be interested:
