Time from Date, your essential time extraction tool, simplifies the process of deriving precise time values from dates in various scenarios. This feature empowers you to navigate through date-time data with ease, ensuring that you always have accurate time information at your fingertips. Whether you’re tracking event schedules, monitoring project timelines, or analyzing historical data, ‘Time from Date’ enhances your data management and analysis capabilities. Embrace this powerful function to transform your date-time data into actionable insights and make informed decisions with confidence. With ‘Time from Date,’ you have the means to unlock the true potential of your temporal data, making each analysis more precise and every deadline more manageable.
Data can be shown in Excel in a variety of ways. When it comes to dates and time data in Excel, there are far too numerous options to select from. We will explain a few techniques in this tutorial for removing time from dates in Excel.
This Content Covers:
- How to Remove Time from Date with different Excel options?
- Using Format Cells Dialogue Box
- Using the Format Box from Excel Ribbon
- Using Find and Replace option
- Using Text to Column option
- How to Remove Time from Date in Excel with Excel Formulas?
- Using DATEVALUE Formula
- Using INT Formula
1. How to Remove Time from Date with different Excel options?
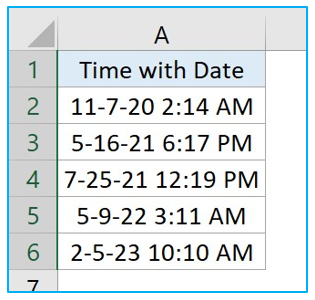
In this table from the picture below, column A contains dates which also have timestamps attached to them. Using the data from this table, we will show you a way to remove the timestamps from these dates in your Excel worksheet.
1.1 Using Format Cells Dialogue Box
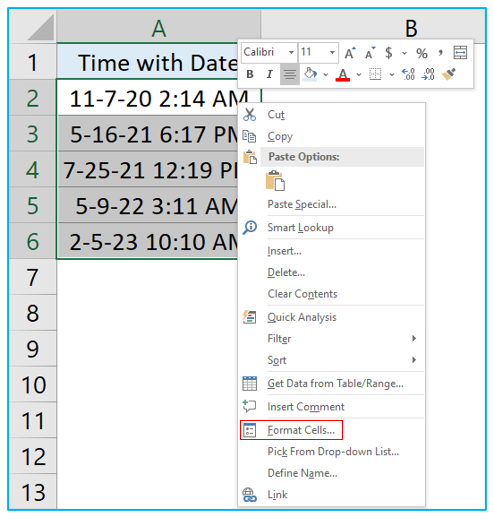
Step 1: Select the range and right-click on them. Click on Format Cells to activate the Format Cells dialogue box. Or simply select the range and then use this shortcut given below to activate the Format Cells dialogue box.
Shortcut: CTRL(hold)+1
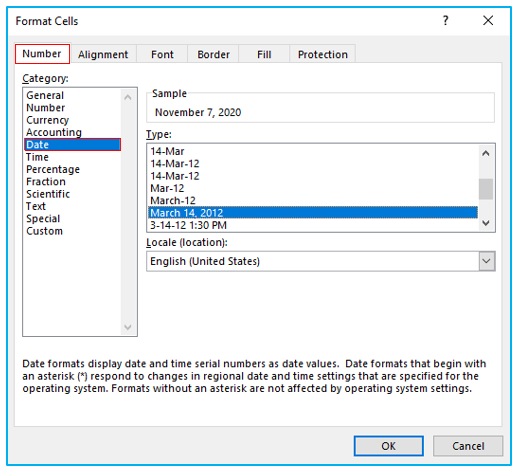
Step 2: From the Format Cells dialogue box go to Number>>Date and select a date format that doesn’t have a timestamp with it. Then click OK.
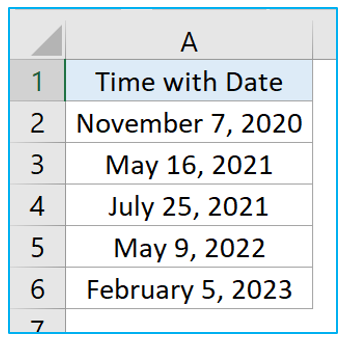
Step 3: The timestamps are removed and only the dates are visible.
1.2 Using the Format Box from Excel Ribbon
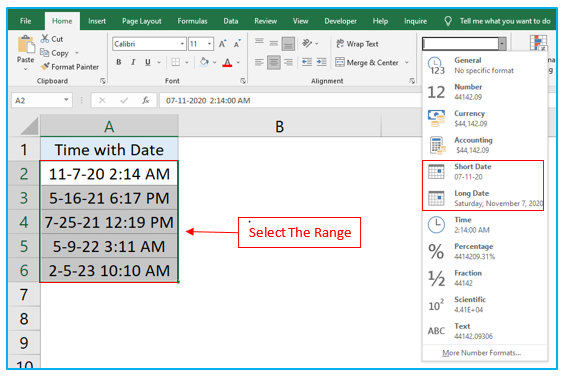
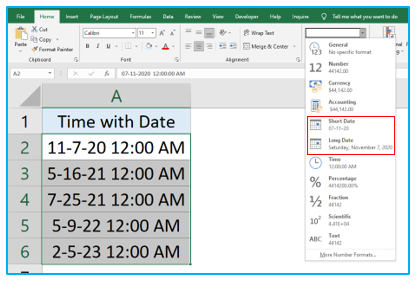
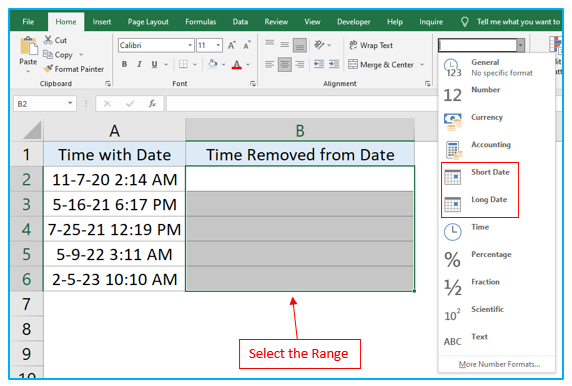
Step 1: Select the range and select Short Date or Long Date from this drop-down list. It will remove the timestamps and will only show the dates.
1.3 Using Find and Replace option
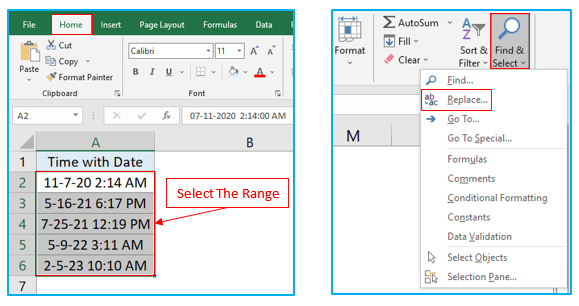
Step 1: Select the range of cells from which you want to remove the time and go to Home>>Find & Select, click on Replace.
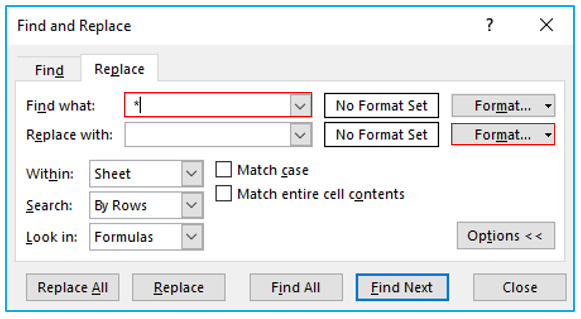
Step 2: Enter * in the Find what: box (a space character followed by the asterisk symbol) and keep the Replace with box blank. Now click on the Format option which is marked inside the picture below.
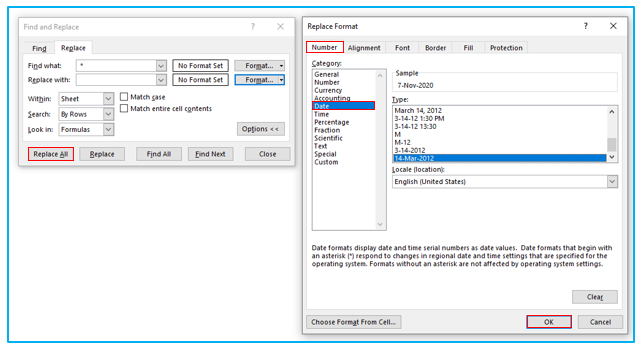
Step 3: From Replace Format dialogue box, choose your desired date format under Number tab and click OK. Now click on Replace All from Find and Replace dialogue box.
Step 4: The Times from these Dates are now removed and only Dates are visible.
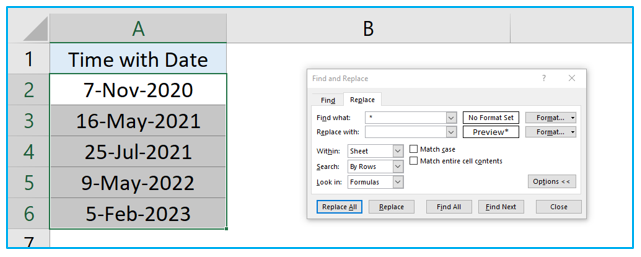
1.4 Using Text to Column option
Step 1: Select the range of cells from which you want to remove the time and go to Data>>Text to Columns.
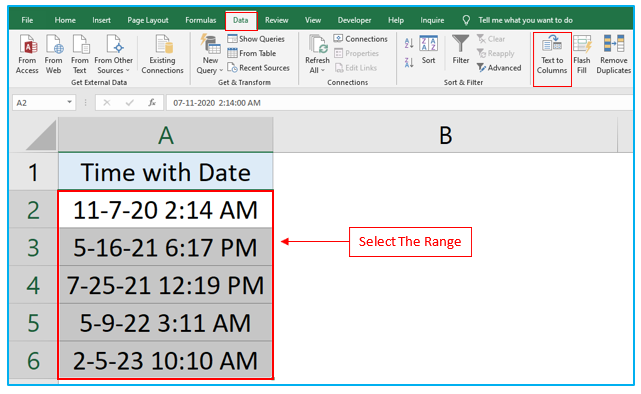
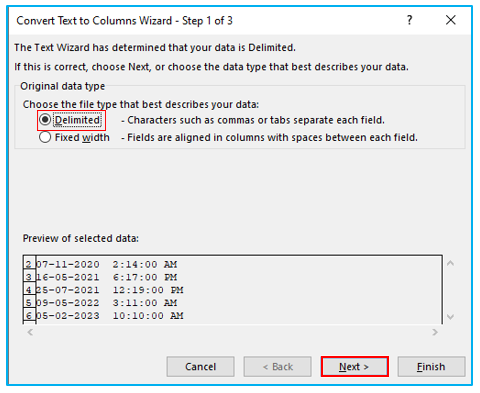
Step 2: Select Delimited and click on Next.
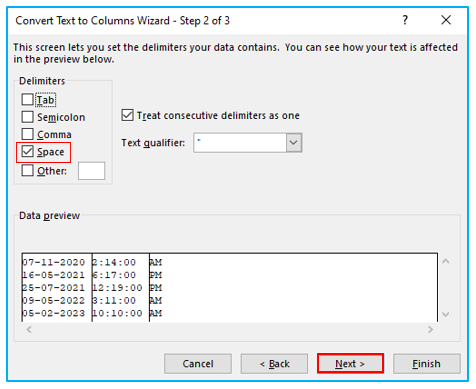
Step 3: Select Space as Delimiters and click on Next.
Step 4: Click on the columns that contain Time values from Data Preview section and select Do not import column(skip) option. Now click on Finish.
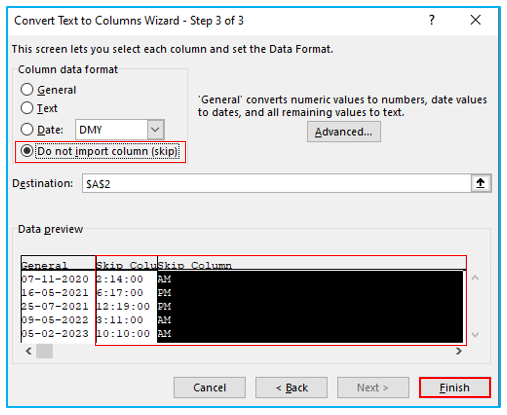
Step 5: These steps will remove times from these dates but you still will see a timestamp (12:00 AM) with all of the dates because the formatting of the cells forces them to show times also with dates. Simply select the range again and choose any date format from the drop-down to change the format of these cells.
How to Remove Time from the Date in Excel with Excel Formulas?
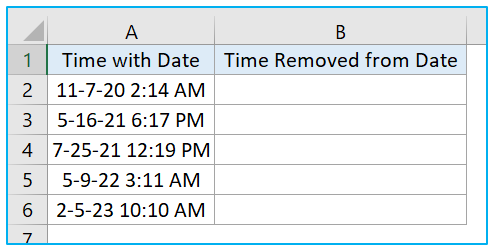
Now we will see how we can utilize some formulas to remove time from a date in Excel using this data from the below picture.
2.1 Using Date Value Formula
Step 1: Insert the following formula in cell B2 and click ENTER key. Now drag the cell downwards to implement the formula in the other cells of this table also.
=DATEVALUE(TEXT(A2,”dd-mm-yyyy”))
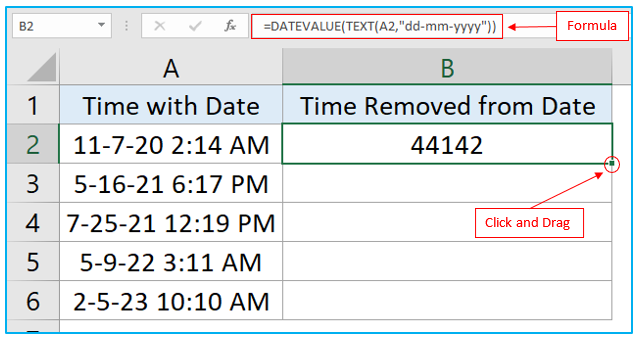
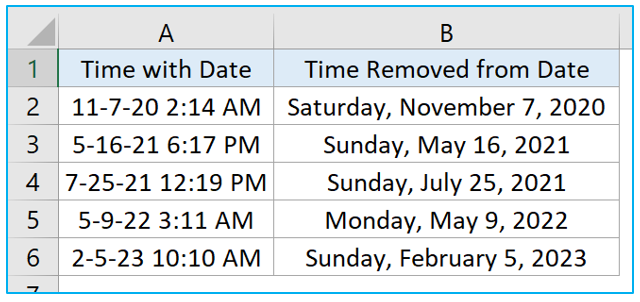
Step 2: This formula will give you a number value if the column or the range of cells are not formatted as Date. Simply select the number values and choose Short Date or Long Date or you can choose any other date format from the Format Cells dialogue box using CTRL(hold)+1 shortcut.
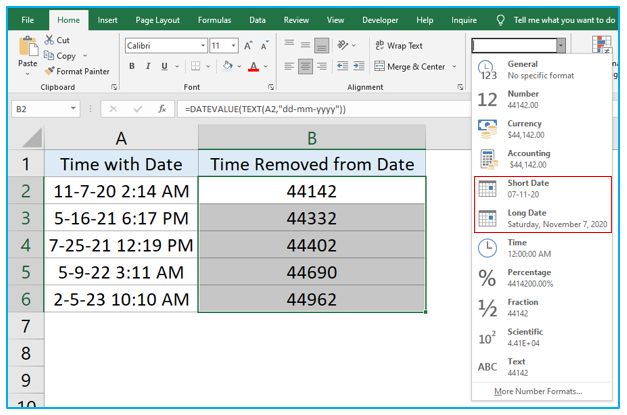
Step 3: Long Date have been selected here.
2.2 Using INT Formula
Step 1: Select column B or the selected range of cells in column B and choose any date format. Here Long Date have been selected.
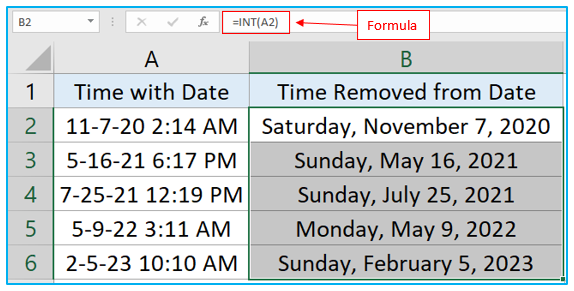
Step 2: Once the cells are formatted as Date, insert the following formula in cell B2 and click ENTER. Drag B2 down to B6.
=INT(A2)
You may be interested:
