Inserting rows in Excel is a common task for managing and organizing data, whether you are working on a small or large dataset. While there are several ways to insert rows in Excel, using shortcut keys can save you time and effort. In this guide, we will walk you through the step-by-step process of inserting a row in Excel using shortcut keys. By the end of this tutorial, you will be able to quickly insert new rows into your spreadsheets and increase your productivity.
Insert Row in Excel
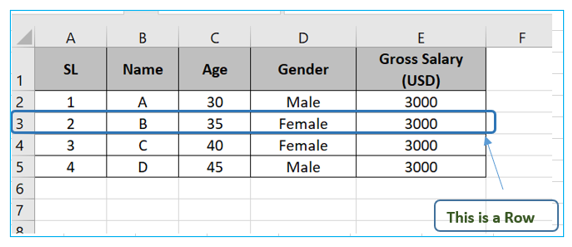
Rows are a horizontal group of cells, outlined in blue below
Insert row from Insert Cell option
Step-1: Select the entire row below where you want to add the new row, outlined in Green below:

Step-2: Click the insert row option from Insert dialogue box, outlined in Red below:
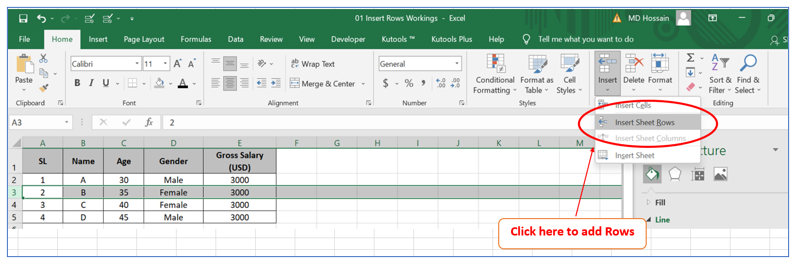
Result outlined in Green below:

Insert row through right click in cell
Step-1: Select the entire row below where you want to add the new row, outlined in Green below

Step-2: Right click and select Insert, outlined in Red below
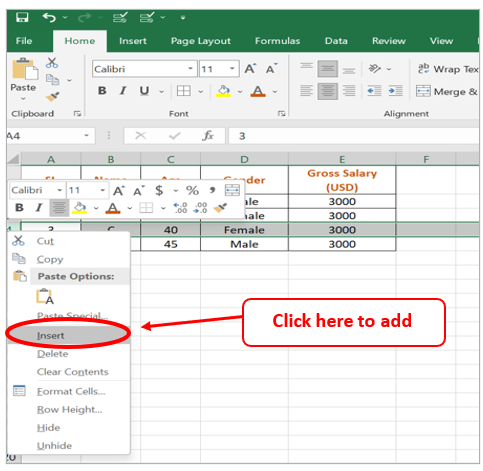
Result outlined in Green below:

Insert row from a selected cell
Step-1: Select the cell below where you want to add the new row, outlined in red below
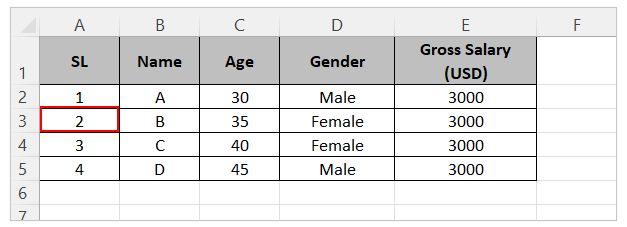
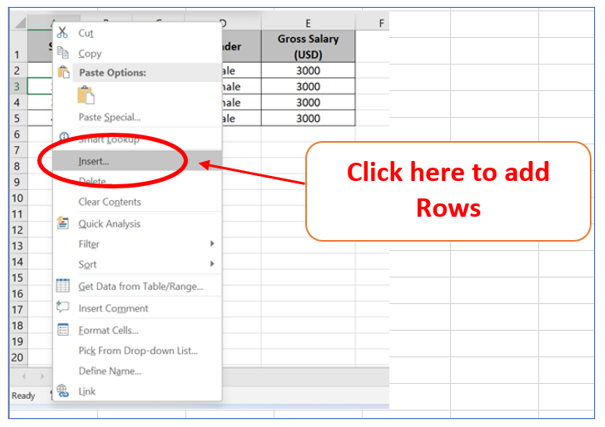
Step-2: Right click and select Insert, outlined in Red below
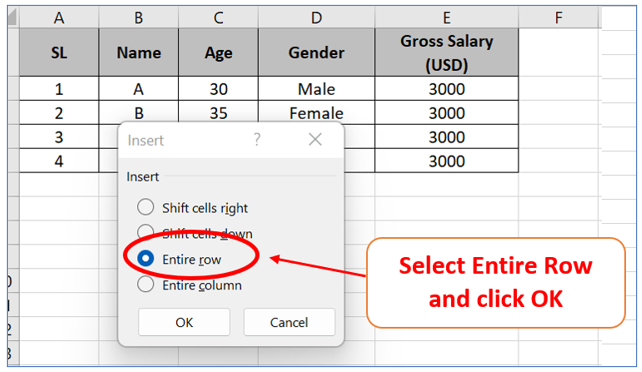
From the Insert pop up select ‘Entire Row’
Result outlined in Green below:

How to Insert row in Excel Shortcut:
In next part of tutorial, we will see shortcut to insert row in excel.
Step-1: Select the entire row below where you want to add the new row, outlined in Green below

Step-2: Press ‘CTRL+Shift+Plus’ sign (+) from keyboard, result outlined in Green below

Insert multiple rows through shortcut key
To insert multiple rows at a time – select number of rows you want to insert, say in below we want to two rows

Then press ‘CTRL+Shift+Plus’ sign (+) from keyboard, result outlined in Green below

Application of Insert Row in Excel
For ready-to-use Dashboard Templates:
