- How to set roe height in excel numerically?
- How to Auto fit row height in Excel?
- How to change row height in Excel using the mouse?
- How to restrict accessing Rows by protecting the Worksheet?
- What happens if you try to insert more rows than the maximum limit?
- Notes about Excel rows.
1. How to set row height in excel numerically in Excel?
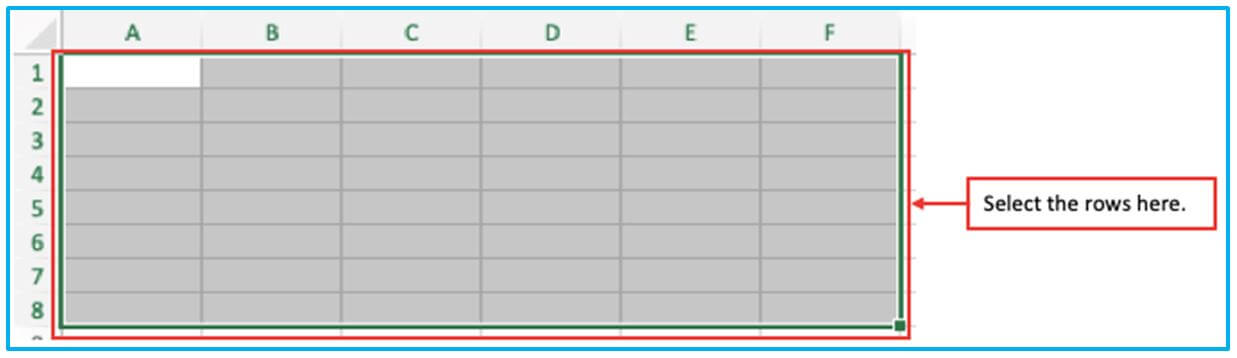
Step 1: First, you need to determine the rows that you will set the height of.
select the rows as shown in the image below.
Here is the image of selected rows.
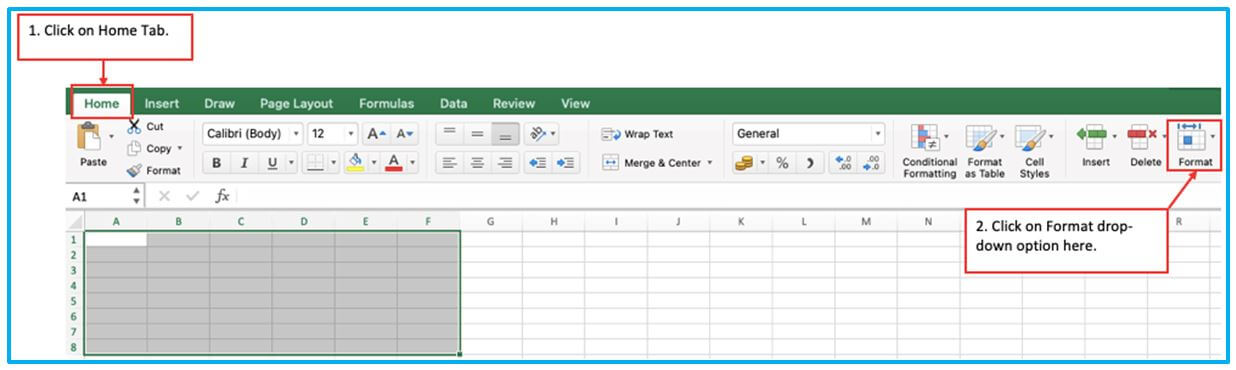
Step 2: Now, Select the Format option from the Home tab and click on the drop-down option there.
Here below, format option is selected here.
Step 3: When you click on the format drop-down box there, you will get an option like this below picture and click on the height option from there.
The Height option has been chosen here.

Step 4: After clicking on the Row Height there will show a bar as the below image and here selected 10 for the Row Height then press OK.
The Row Height is selected here.

Step 5: After clicking on OK button you can see that Raw height will be displayed as a function of the values entered.
Here are all of the results.

2. How to Autofit row height in Excel?
Step 1: Enter a line or data as shown in the image, here taken Hello World as a data.
You can take the above example for using Autofit row height in Excel.

Step 2: Now, select the information and click on format drop-down option from home tab.
You can see below the format option has been selected.

Step 3: When you select the formatting option, certain details will be shown in the box below where you need to choose Autofit row height.
You can see below the Autofit row height is chosen in the image.

Step 4: After using Auto fit row height option the result will look like this.
Here is the result.
3. How to change row height in Excel using the mouse?
Step 1: At first open a blank excel sheet and you must first decide on the row that you want to display at height. Select the row as shown in the image below
The selected row is shown in the image below.

Step 2: Then, select the Format option from the Home tab and click on the drop-down menu.
Below, the format option is chosen here.

Step 3: You will get an option like this below picture and click on the height option from there.
Select the Height option here.

Step 4: When you click on Row Height, a bar will appear in the image below. In this case, choose Row Height and OK next.
Row height is selected here.

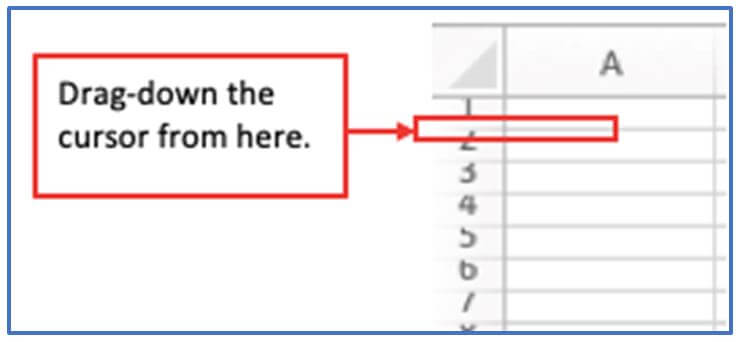
Step 5: To adjust the height of a row, simply slide or drag the mouse cursor from the lower boundary of the row header into place and wait until the row is set to its desired height.
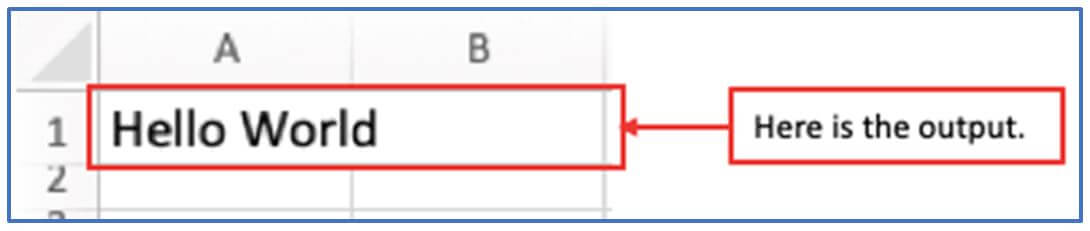
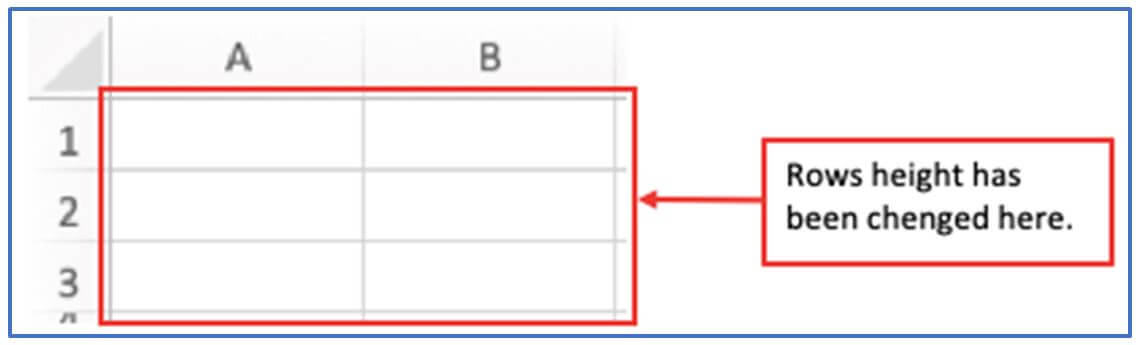
Step 6: Here you can see below the row height has been changed.
Here is the output.
4. How to restrict accessing Rows by protecting the Worksheet?
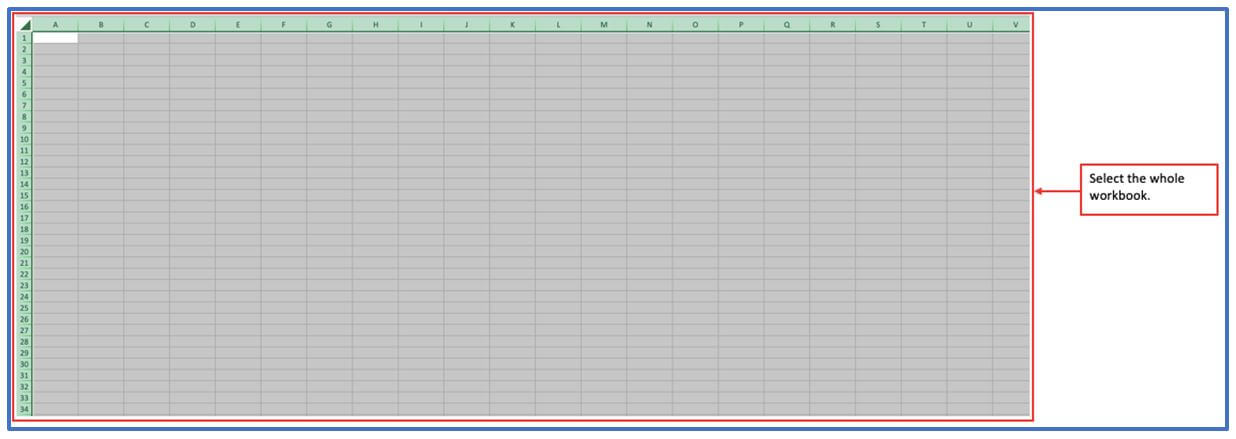
Step 1: First, select the entire workbook.
You can see below the entire workbook has been selected.
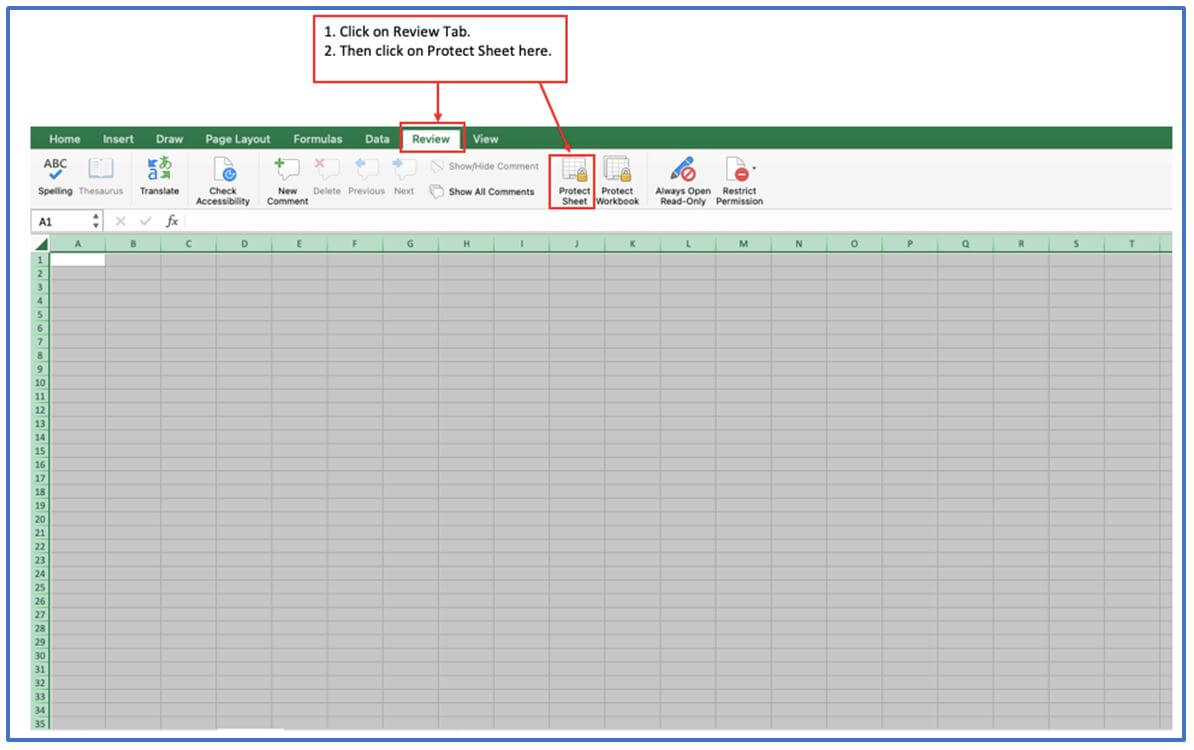
Step 2: Afterwards, select the “Review” tab. Choose “Protect Sheet” now as shown below.
Followed the above information here.
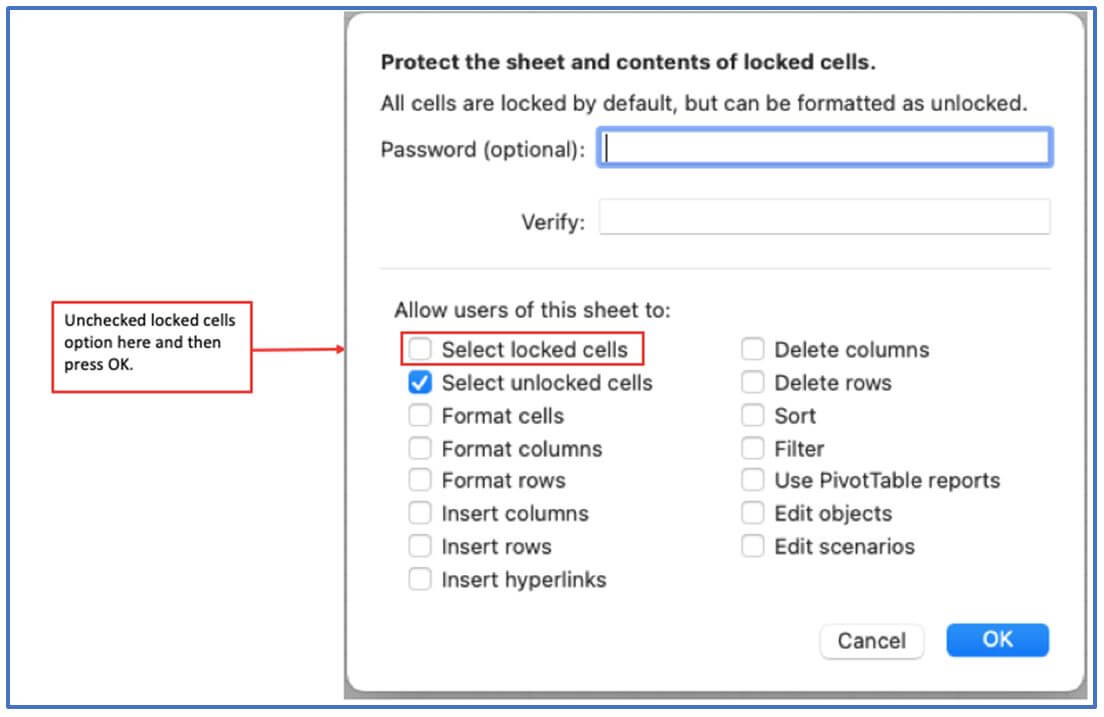
Step 3: Among the sheet protection options, uncheck the “Select locked cells” option
If this option is not checked, Excel will no longer allow users to select locked cells.
Unselected the Select locked cells option below.
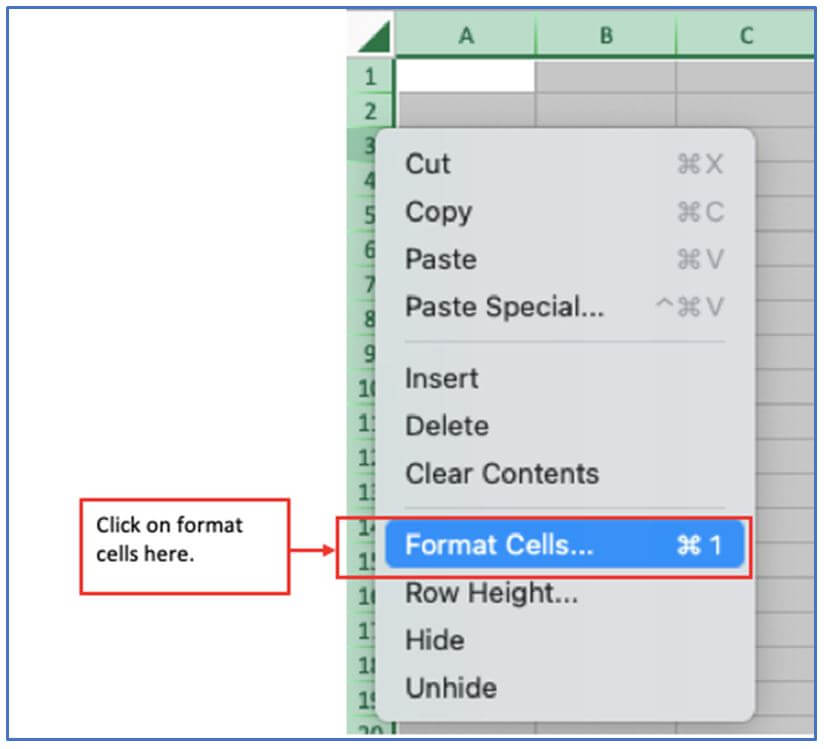
Step 4: The entire spreadsheet is locked and inaccessible because we have protected the entire spreadsheet. Now we need to unprotect the rows or fields that we want users to have access to Determine which rows to include. Now right-click and select the “Format Cells” option.
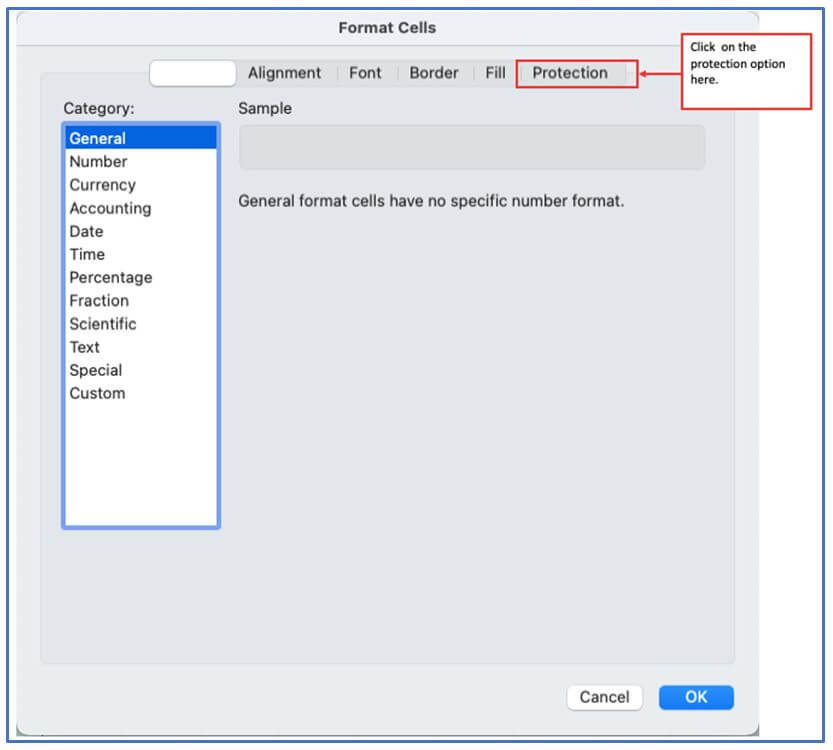
Step 5: After clicking on the Format Cells, a Format Cells bar will be appeared as like below and press on the protection option.
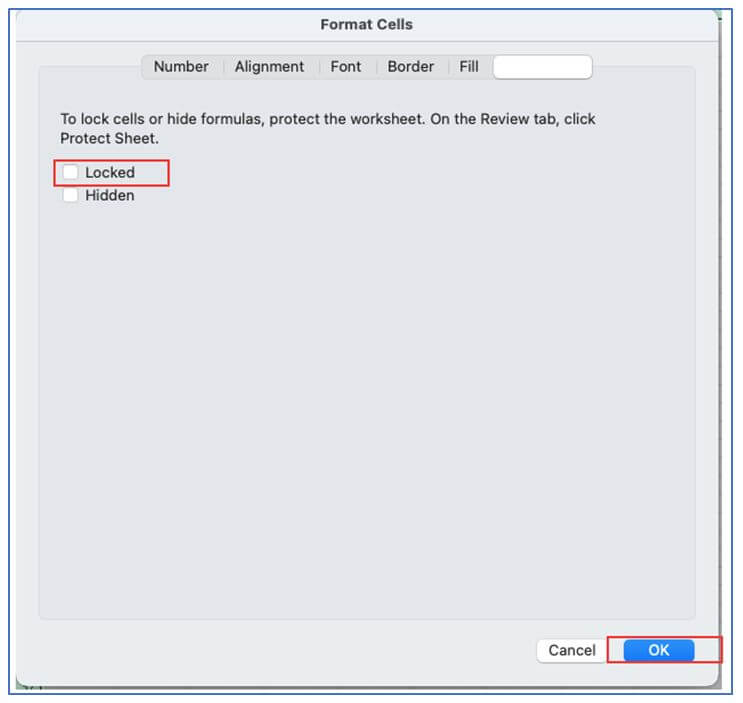
Step 6: While getting the Format cells bar, select the option to unprotect the range from the “Format Cells” option and then press okay. After that, the user can only see selected rows as they are now restricted to.
5. What happens if you try to insert more rows than the maximum limit?
Behavior of error messages: Due to the maximum limit being reached, Excel is unable to insert additional rows, leading to an error message.
It could be a message that shows “Cannot insert new rows” or “Excel cannot insert rows that exceed the limit of 1,048,576 rows.
Cannot add rows Behavior: The option to add more rows will be disabled. This will cause the rows you want to add to be not displayed and no data to enter above that limit, if any.
Excel will not accept rows greater than the maximum that can be added.
Capability issues with their behavior: Attempts to perform rows-related actions, such as copying and pasting large data sets, close or approach the row limit, leading to potential performance issues with Excel. The performance of your work can be negatively affected even if you are not actively exceeding the limit.
Behavior problems related to data management: Managing and organizing the data can be difficult when you reach the row limit on a large data set.
It is possible that dividing the data into several worksheets or workbooks, as well as other techniques, may be necessary in this scenario.
6. Notes about Excel rows.
- Excel’s row wrapping system only conceals the rows that are not required.
- Inactive rows are not included in the current worksheet and can be found only in a new worksheet.
- When scrolling through the options, we can disable some of the rows and only affect the current worksheet. Changing the property for one worksheet only affects those worksheets, and when the code is viewed and modified, other worksheet’s properties remain unaffected.
- In case one of the rows is hidden, row numbers will not be assigned and the other two rows will remain unassigned. When the first 10 rows are hidden, it is assumed that the 11th row will be the earliest. The 11th row will remain the 11th row because Excel wants the user to be informed that certain rows are hidden
- When restricting rows, the “Scroll Area” option can be used to modify them, but it is not accessible for all users. To prevent other users from altering the rules we have established regarding the available rows, we need to use the “Protect Sheet in Excel” feature and provide a password.
Application of Fix row limit in excel
- Manage Large Datasets – Overcome the 1,048,576-row limit by using Power Query or splitting data into multiple sheets.
- Enhance Performance – Prevent Excel from slowing down or crashing by optimizing data handling techniques.
- Use External Databases – Store excess data in SQL or Access and link it to Excel for seamless analysis.
- Leverage Pivot Tables – Summarize large datasets without exceeding the row limit, improving data visualization.
- Optimize File Size – Reduce Excel file size by removing unnecessary data or using efficient data structures.
- Utilize Power BI Integration – Connect Excel to Power BI for advanced data analysis beyond the row limit.
For ready-to-use Dashboard Templates:
