Named ranges in Excel offer a plethora of benefits, from organizing data to simplifying formulas and enhancing data validation. By utilizing named ranges, users can improve the clarity and efficiency of their spreadsheet workflows. Whether it’s for dynamic data selection, chart creation, or pivot table, excel table management, named ranges provide a flexible and intuitive way to work with data. With Named Range in Excel, users can unlock the full potential of their spreadsheets, ensuring accuracy and ease of use throughout their Excel projects.
This Tutorial Covers:
- How to create Named Range in Excel? / How do you make a named range in Excel?
- How to Name a Range in Excel? / How to Create Named Ranges in Excel?
- Method 1: By typing name in Name Box
- Method 2: By using Define Name Option
- Method 3: By using Name Manager Option
- Method 4: Using Create from Selection Option
- How to manage multiple Named Range? / How to handle multiple named ranges?
- Method 1: By getting the Names of all the Named Range
- Method 2: Displaying the Matching Named Ranges
- How to Edit Named Range in Excel? / How to Modify a Named Range in Excel?
- How to Delete Named Ranges in Excel? / How to Remove Named Ranges from Excel?
- How to create a dynamic named range in Excel? / Creating Dynamic Named Ranges in Excel
- How to Use Excel Named Ranges?
1. How do you create named range in Excel?
A classic excel can have many different formulas and keeping track of all of the cell ranges used by those formulas can be difficult. To make it easier, users can give any cell range a more intuitive, descriptive name and then use those named ranges in their formulas. To create from selection in Excel, simply select a cell or select the range and type the name you want into the Name box to create a named range. Users can then utilize the new name to refer to that cell range at any time.
2. How to Name a Range in Excel? / Range Names in Excel.
In Excel, there are four different ways to define a name:
- By typing name in Name Box
- By using Define Name Option
- By using Name Manager Option
- Using Create from Selection Option
2.1 Method 1: By typing name in Name Box
Below are the steps for using Name Box to create an Excel Named Range:
Step 1: Select a cell or a range of cells to name. Here we select cell A2:A7.
Step 2: Enter what you want to name as Named Range in the Name Box on the left of the Formula bar.
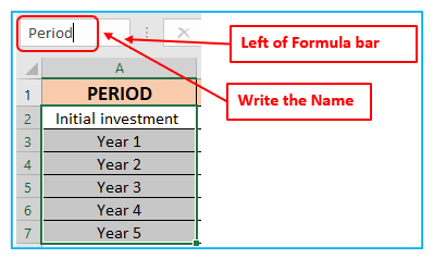
Step 3: Press the Enter.
2.2 Method 2: By using Define Name Option (define and use names)
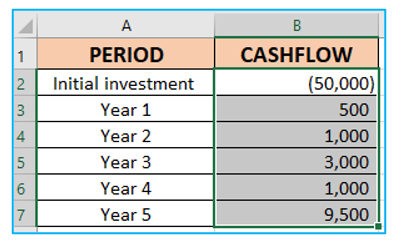
Step 1: Select a cell or a range of cells to name. Here we select cell B2:B7
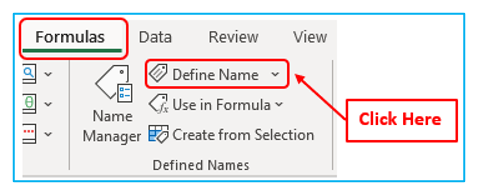
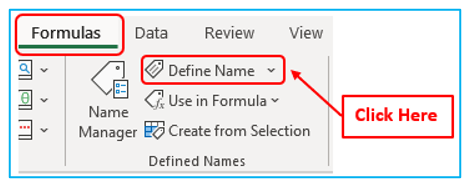
Step 2: Go to the Formulas tab, in the Define Names group, click on the Define Name button.
Step 3: Enter the following information in the New Name dialog box:
- Fill in the range name in the Name box.
- Set the name scope in the Scope dropdown (Workbook by default).
- Check the reference in the Refers to box and correct it if necessary.
-

Named Range in Excel
Step 4: Click OK.
2.3 Method 3: By using Name Manager Option
Step 1: Select a cell or a range of cells to name.
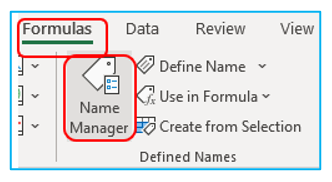
Step 2: Go to the Formulas tab, in the Define Names group, click on the Name Manager. Keyboard Shortcut Ctrl + F3.
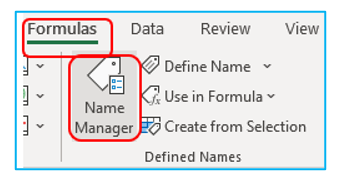
Step 3: Click the New… button in the upper left corner of the Name Manager dialog window.
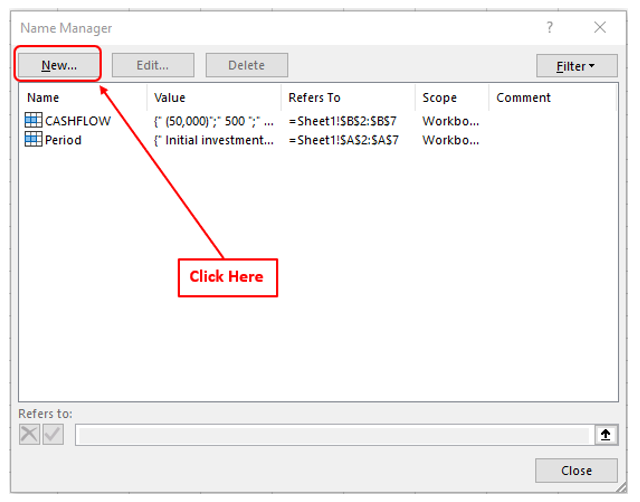
Step 4: This brings up the New Name dialog box. Enter the following information in the New Name dialog box:
- Fill in the range name in the Name box.
- Set the name scope in the Scope dropdown (Workbook by default).
- Check the reference in the Refers to box and correct it if necessary.
Step 5: Click OK.
2.4 Method 4: Using Create from Selection Option
Step 1: Select the whole table.
Step 2: Go to the Formulas tab, in the Define Names group, click on the Create from Selection. Keyboard Shortcut Ctrl + Shift + F3.
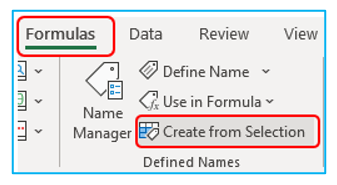
Step 3: The Create Names from Selection dialog box will appear. Click OK after selecting the column or row with headers, or both.
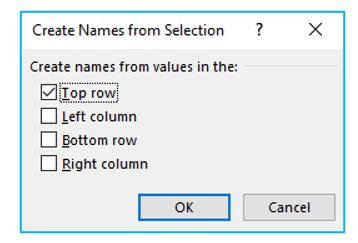
Excel will generate named ranges based on the names in the headers.
3. How to Manage multiple Name Manager in Excel?
When working with large data sets and statistical models, users could find oneself producing a significant number of Named Ranges in Excel.
3.1 Method 1: By getting the Names of all the Named Range
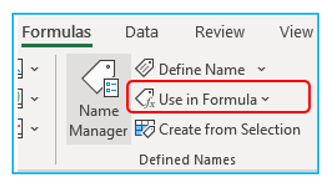
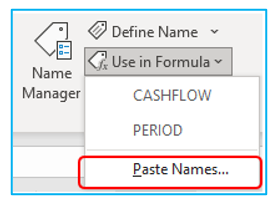
Step 1: Go to the Formulas tab, in the Define Names group, click on ‘Use in Formula’.
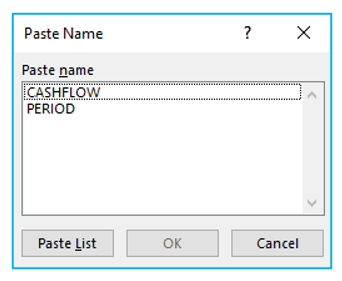
Step 2: Select ‘Paste Names.’
It thus returns a list of all the Named Ranges in that workbook. Double-click on a named range (in formulas or a cell) to use it. Result outlined below:
3.2 Method 2: Displaying the Matching Named Ranges
Try typing a few first characters, and Excel will display a drop-down list of names that match.
4. How to Edit Named Range in Excel? / How to Modify a Named Range in Excel?
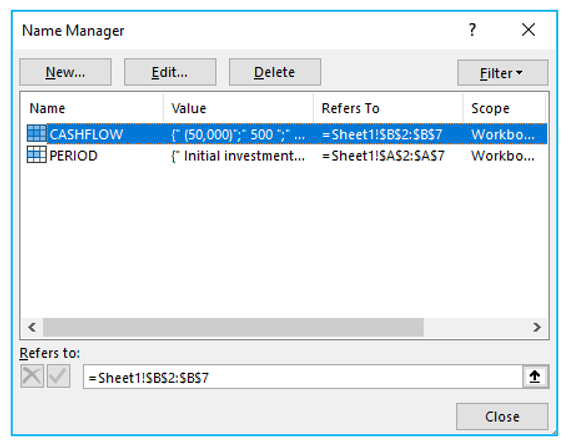
Step 1: Go to the Formulas tab, in the Define Names group, click on the Name Manager. Keyboard Shortcut Ctrl + F3.

Step 2: The Name Manager dialog box displays a list of all the Named Ranges in that workbook.
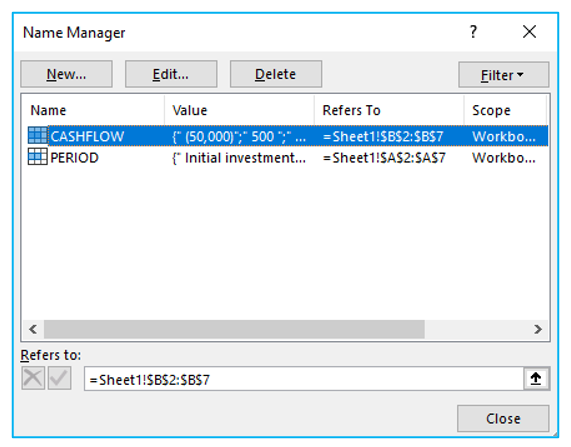
Step 3: Double-click the Named Range you want to modify. Or click on the Edit… Option. This will open the Edit Name dialog box.
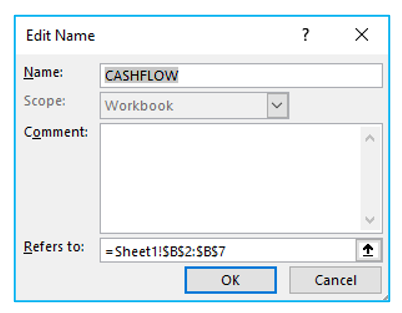
Step 4: Make the necessary changes in the Edit Name dialog box. Click OK after that.
5. How to Delete Named Ranges in Excel?
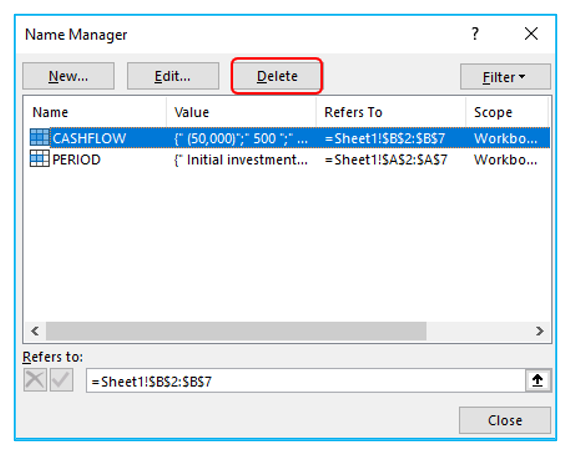
Step 1: Go to the Formulas tab, in the Define Names group, click on the Name Manager.
Step 2: The Name Manager dialog box displays a list of all the Named Ranges in that workbook. Choose the one you want to remove.
Step 3: Click the Delete button.
6. How to create a dynamic named range in Excel by formula? Dynamic Range.
When you’re operating with a constantly changing data set, you might want to make your named range dynamic so that it expands to accommodate newly added entries and contracts for excluding removed data.
Step 1: Go to the Formulas tab, in the Define Names group, click on the Define Name button.
Step 2: Enter the following information in the New Name dialog box:
- Fill in the range name in the Name box.
- Set the name scope in the Scope dropdown (Workbook by default).
- Refers to: =$A$2:INDEX($A$2:$A$50,COUNTIF($A$2:$A$50,”<>”&””))
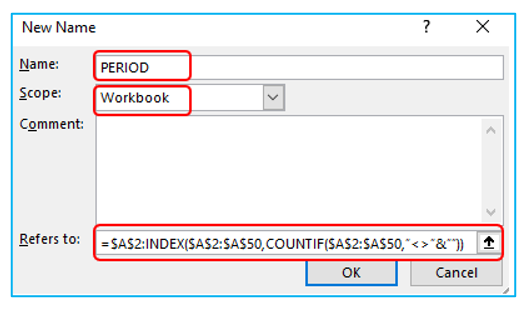
Step 3: Click OK.
7. How to Use Named Ranges in Excel?
Upon generating names, users can use the named range as follows:
- Make Use of Names for Easy Navigation
- In Formulas, Use Names
Make Use of Names for Easy Navigation
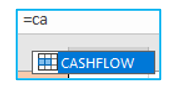
When a name refers to a range, users can use the Name Box dropdown list to choose the named range on the worksheet.
In Formulas, Use Name Range Reference
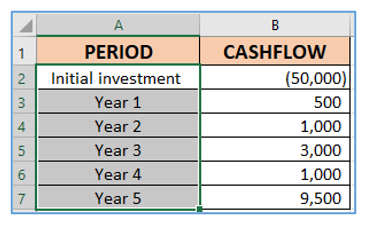
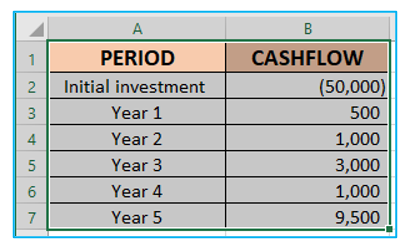
Names can also be used in formulas. For instance, you could have a group of cells with Initial investment. Name those cells CASHFLOW, then use the following formula to calculate the total:
=SUM(CASHFLOW)
Application of Named Range in Excel
- Data Organization: Named ranges help organize data by assigning meaningful labels to specific cell ranges, enhancing clarity and understanding.
- Formula Clarity: Using named ranges in formulas improves formula readability and makes them easier to understand and maintain.
- Dynamic Data Selection: Named ranges facilitate dynamic data selection, allowing users to easily reference data that may change in size or location.
- Chart Creation: Named ranges simplify chart creation by providing descriptive labels for data series, axes, and titles. Use sheet name to apply name manager in the chart.
- Data Validation: Named ranges can be used in data validation rules to restrict data entry to predefined lists or ranges, ensuring data accuracy.
- Pivot Tables: Named ranges are useful in pivot tables for defining source data, making it easier to update and manage pivot tables as data changes.
For ready-to-use Dashboard Templates:
