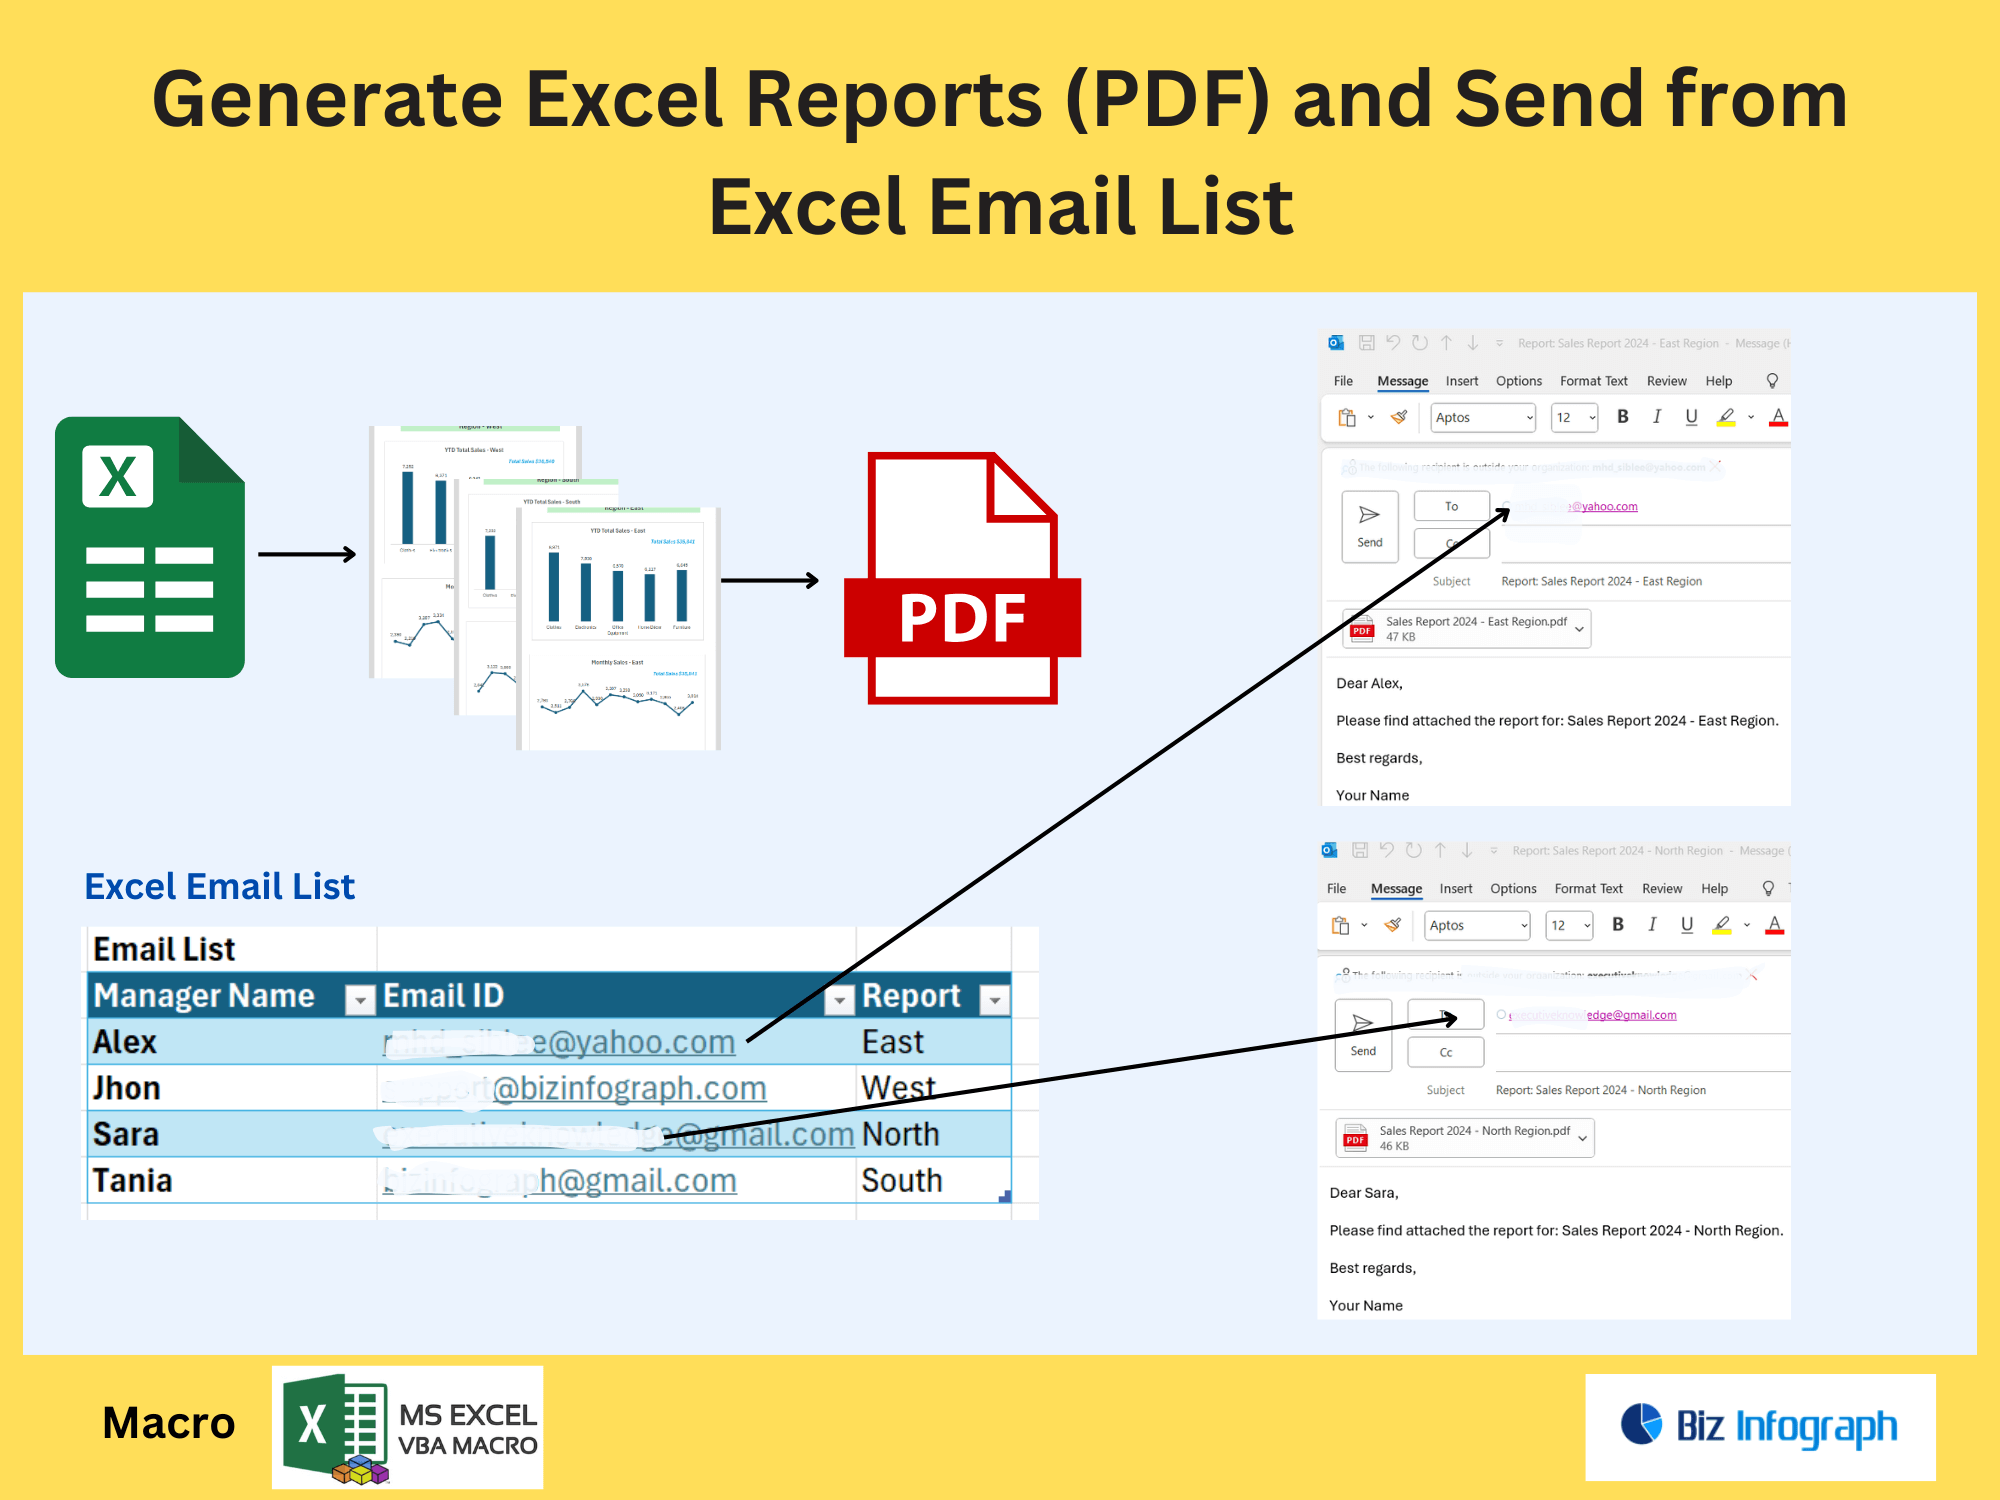
Send Report from Excel Email List for Each Person by Power Automate
Why Automate Email Reports from Excel?
Challenges of Manual Email Sending
Manually sending emails from Excel via VBA or mail merge is error-prone and inefficient. Users risk attaching wrong files, typos in email addresses, or inconsistent messaging. Scaling beyond a few recipients becomes tedious, and version control falters—resending updated reports wastes time. Manual processes lack automation for bulk sends, making them impractical for large teams or frequent updates.
Benefits of Using Power Automate
Power Automate replaces manual efforts by automating email workflows directly from Excel. It ensures accuracy, saves time, and scales effortlessly for bulk sends. Features like dynamic attachments (e.g., %ReportURL%), HTML templates, and integration with SharePoint streamline reporting. Centralized control allows updates to reflect instantly, eliminating version chaos and reducing human error by 90%. Send emails from Excel using Power Automate to automate workflows, schedule bulk sends, personalize with dynamic content via SharePoint data, ensuring error-free, efficient email campaigns while eliminating manual tasks.
How to Set Up Automated Email Reports
Configuring Power Automate Flow
-
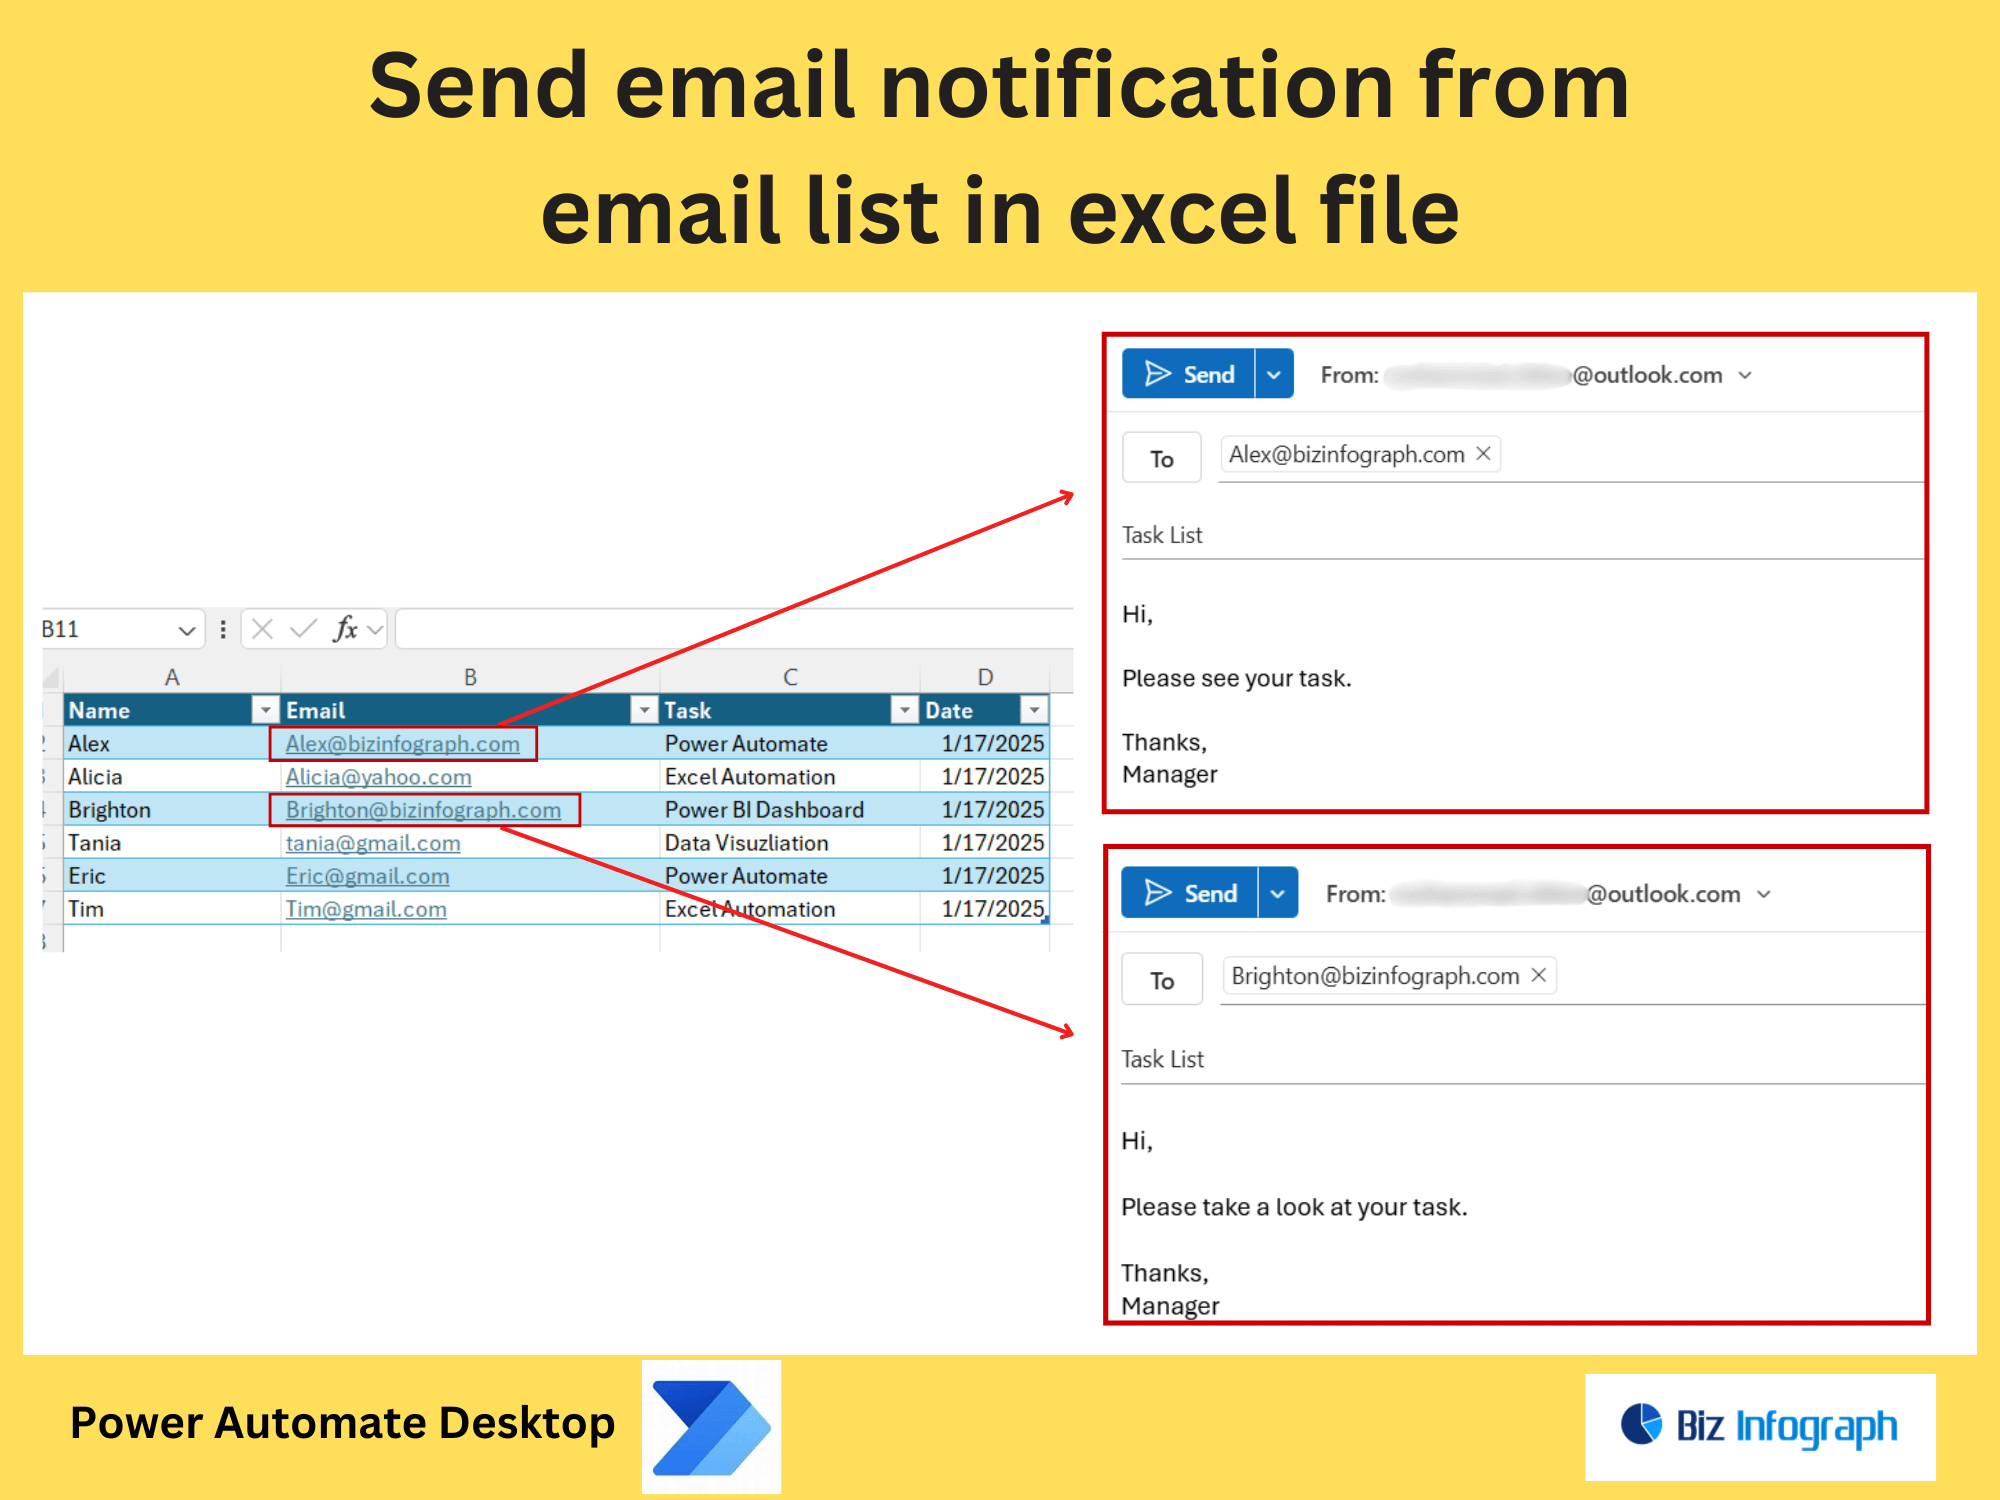
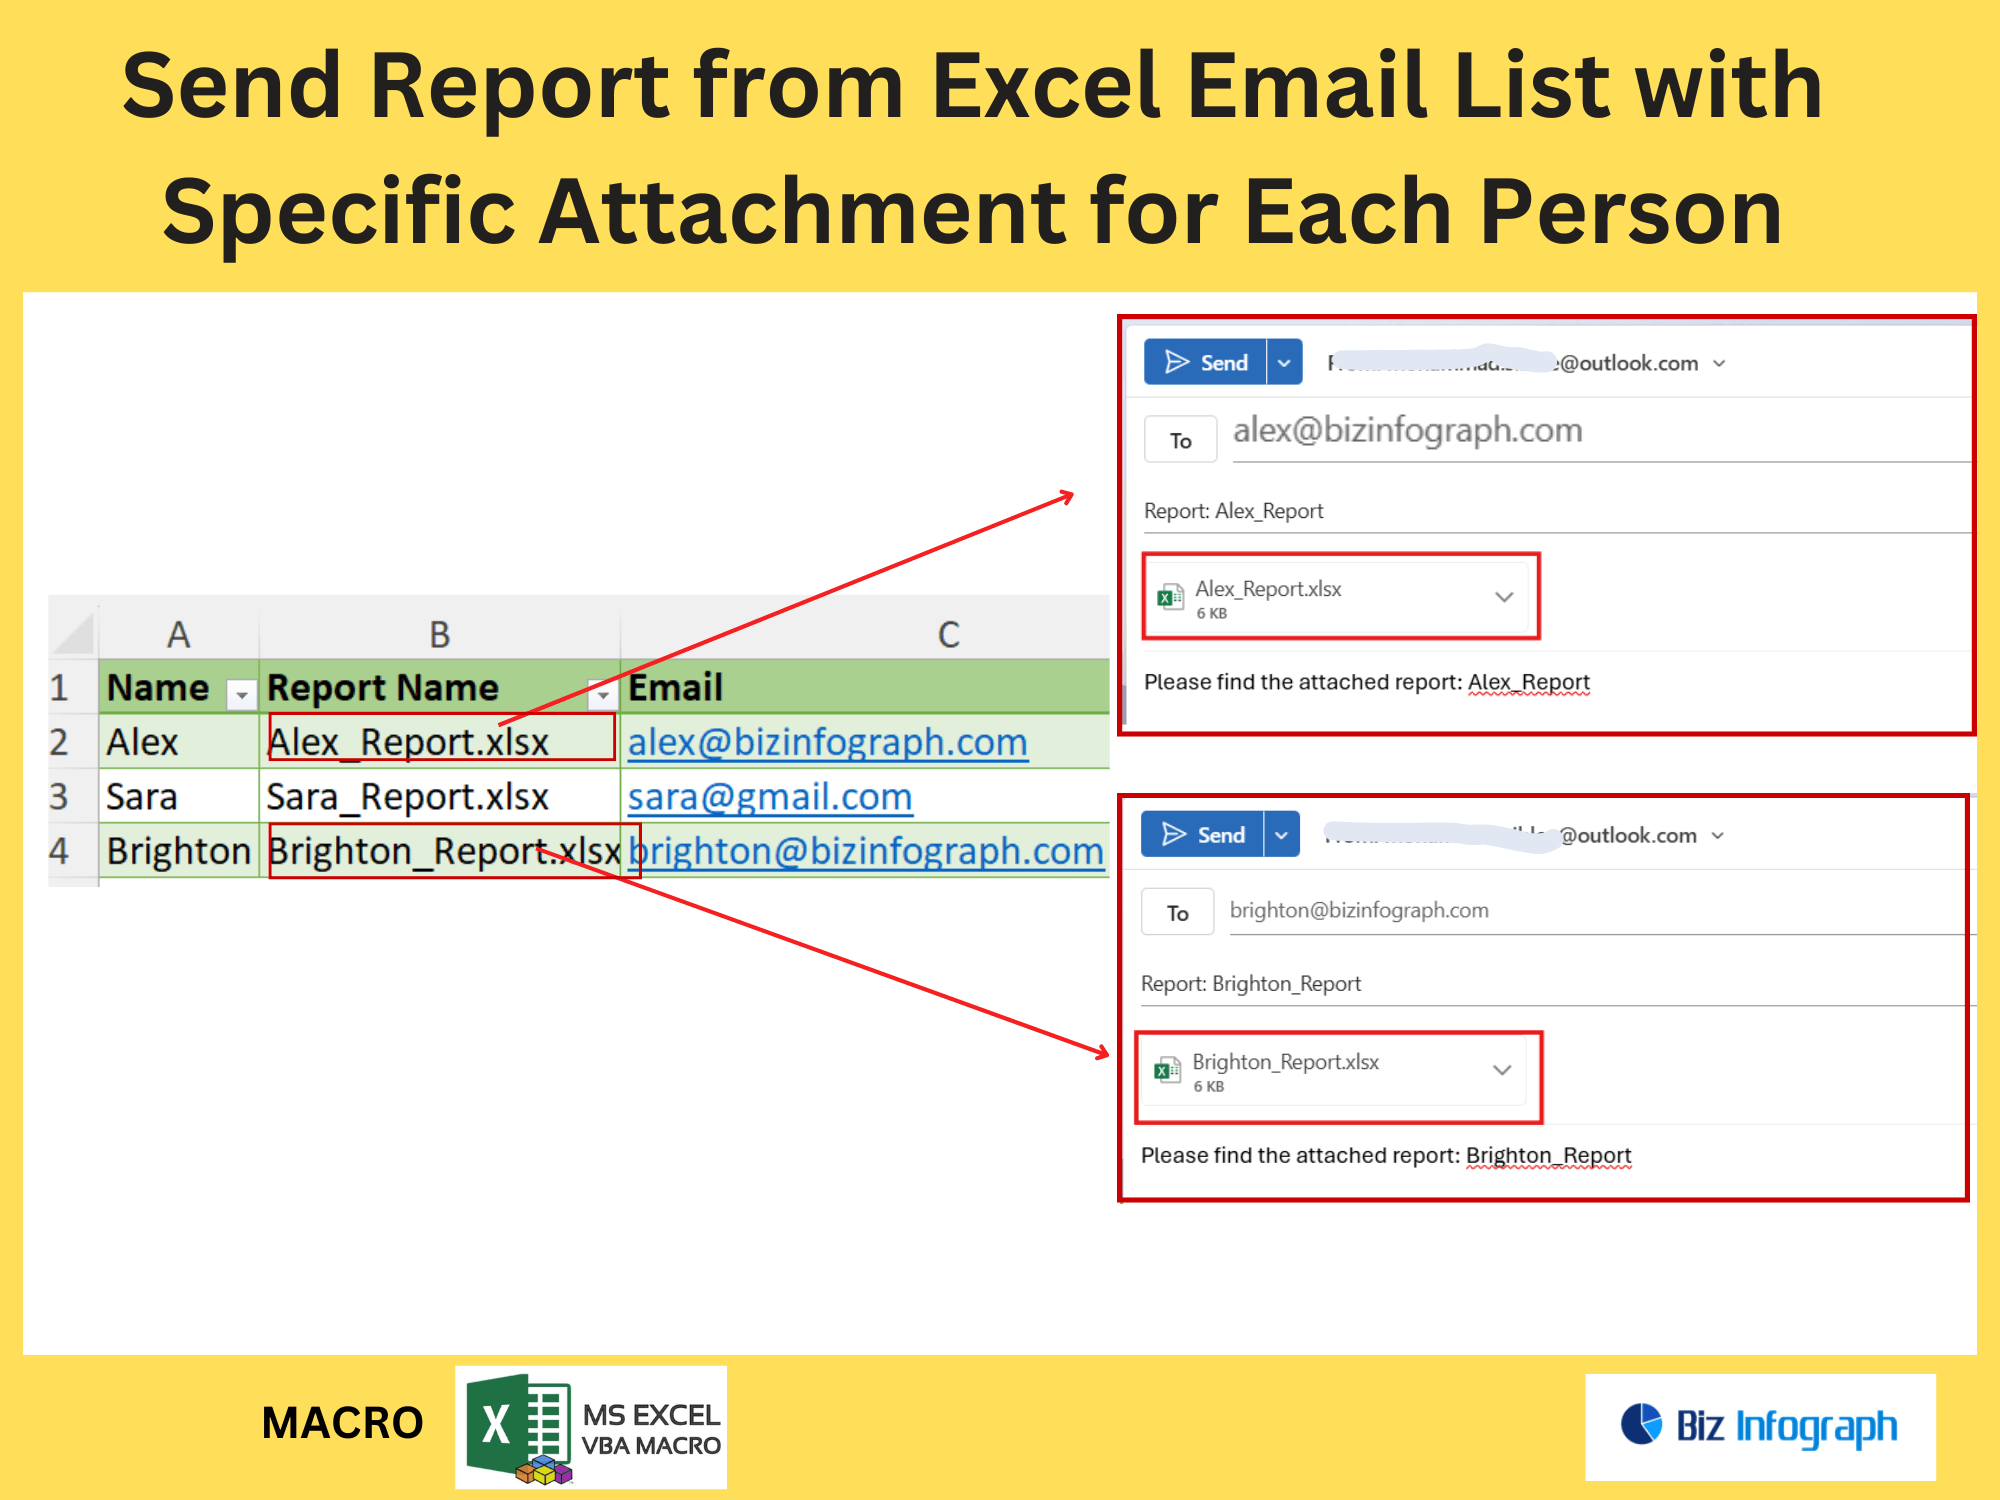
Connect Excel: Link your Excel file (columns:
Email,Name,ReportURL) to Power Automate. -
Trigger: Start on schedule or file update.
-
Loop Rows: Use “Apply to Each” to process recipients.
-
Send Email: Attach files from URL/SharePoint or embed HTML content.
-
Test: Review transcript for errors like invalid paths.
Using Mail Merge with Attachments
Power Automate enhances traditional mail merge by adding dynamic attachments (e.g., PDFs via URL) and HTML personalization. Unlike static VBA, it auto-sends tailored emails (e.g., Hi %Name%, your report: [Link]) and attaches files conditionally (e.g., region-specific PDFs). This eliminates manual file linking and ensures bulk emails are professional and error-free.
Step-by-Step Guide to Automate Emails
Preparing the Excel Workbook
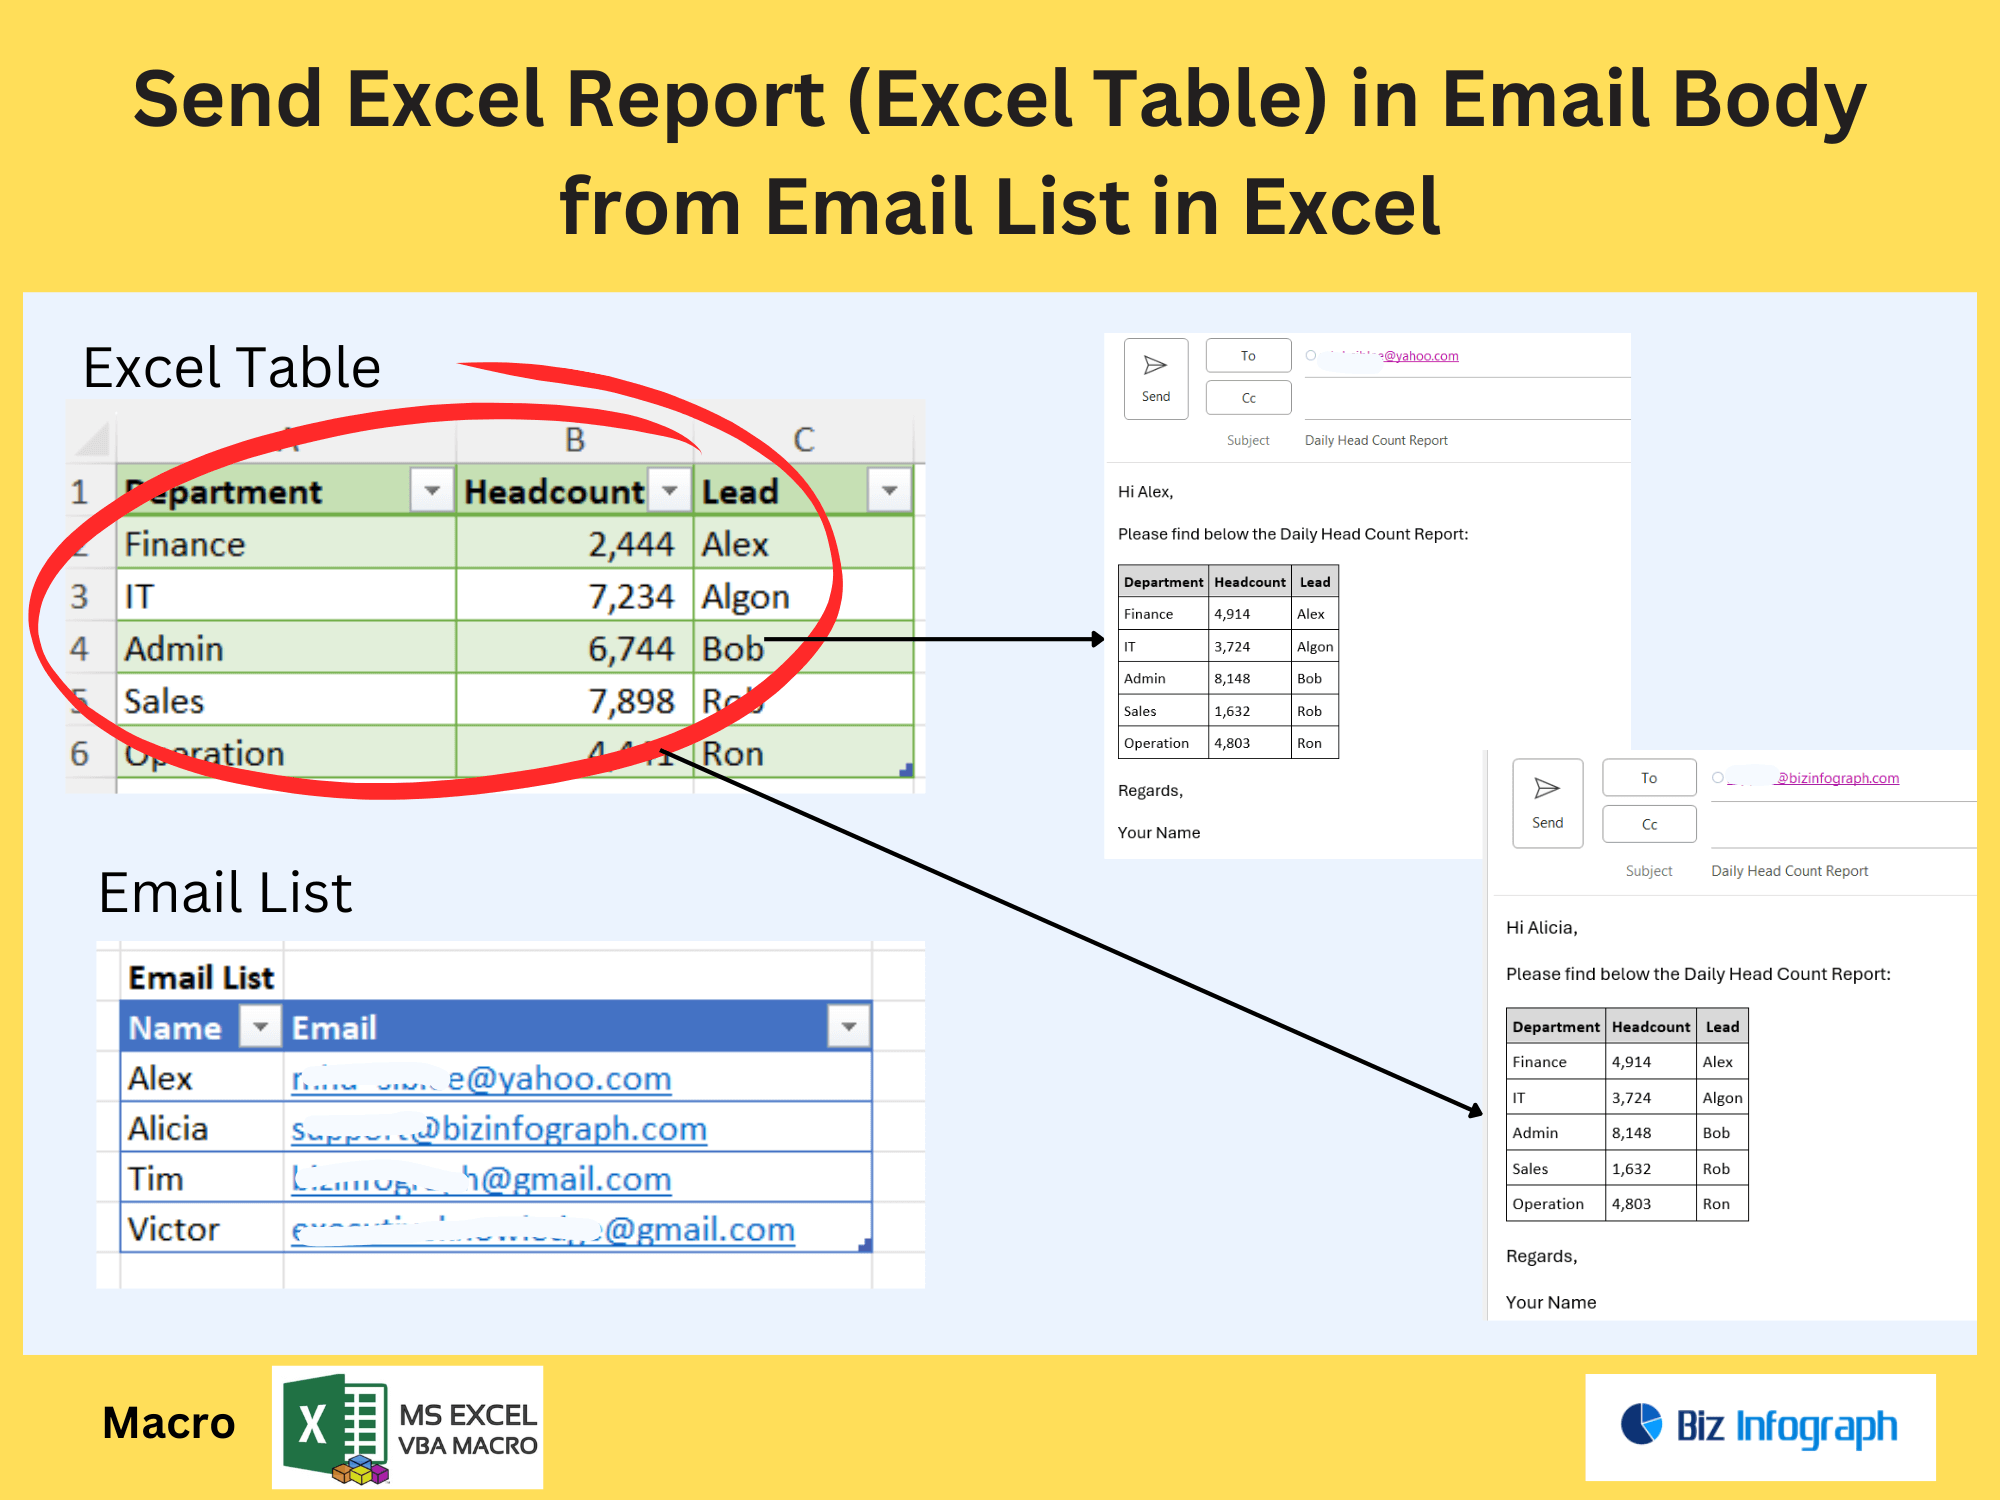
Structure Excel with columns: Email, Name, ReportURL (e.g., https://sharepoint.com/reports/%Name%.pdf). Ensure attachments are stored in SharePoint with consistent naming (e.g., Sales_%Region%.pdf). Validate email formats and test URLs to avoid broken links. Proper setup ensures seamless automation and reduces workflow errors.
Creating the Flow in Power Automate
-
Link Excel: Use the Excel connector to access data.
-
Loop & Send: Iterate rows, populate
%Name%in HTML bodies, attach files via%ReportURL%. -
Attachments: Fetch files from SharePoint using URLs.
-
Test Flow: Send a sample email, check transcript for missing files or invalid emails.
Advanced Tips and Troubleshooting
Dynamic Content and Attachments
Leverage Microsoft Excel data to attach files conditionally (e.g., Budget.pdf only if Department=Finance). Use URLs for cloud-stored reports or embed HTML for branded templates (e.g., headers, buttons). This flexibility ensures tailored communication without manual adjustments, even for bulk sends.
H3: Fixing Errors in Automation
Review the transcript for failures like invalid attachments or email formats. Fix issues by:
-
Correcting Excel data (e.g., valid
ReportURLpaths). -
Adjusting SharePoint permissions.
-
Adding filters to skip blank entries.
-
Retrying failed sends with updated logic.
For ready-to-use Dashboard Templates: