Move Files to Folders Based on File Extension by Power Automate
Why Move Files Based on Extensions Using Power Automate?
The Need for Automated File Organization
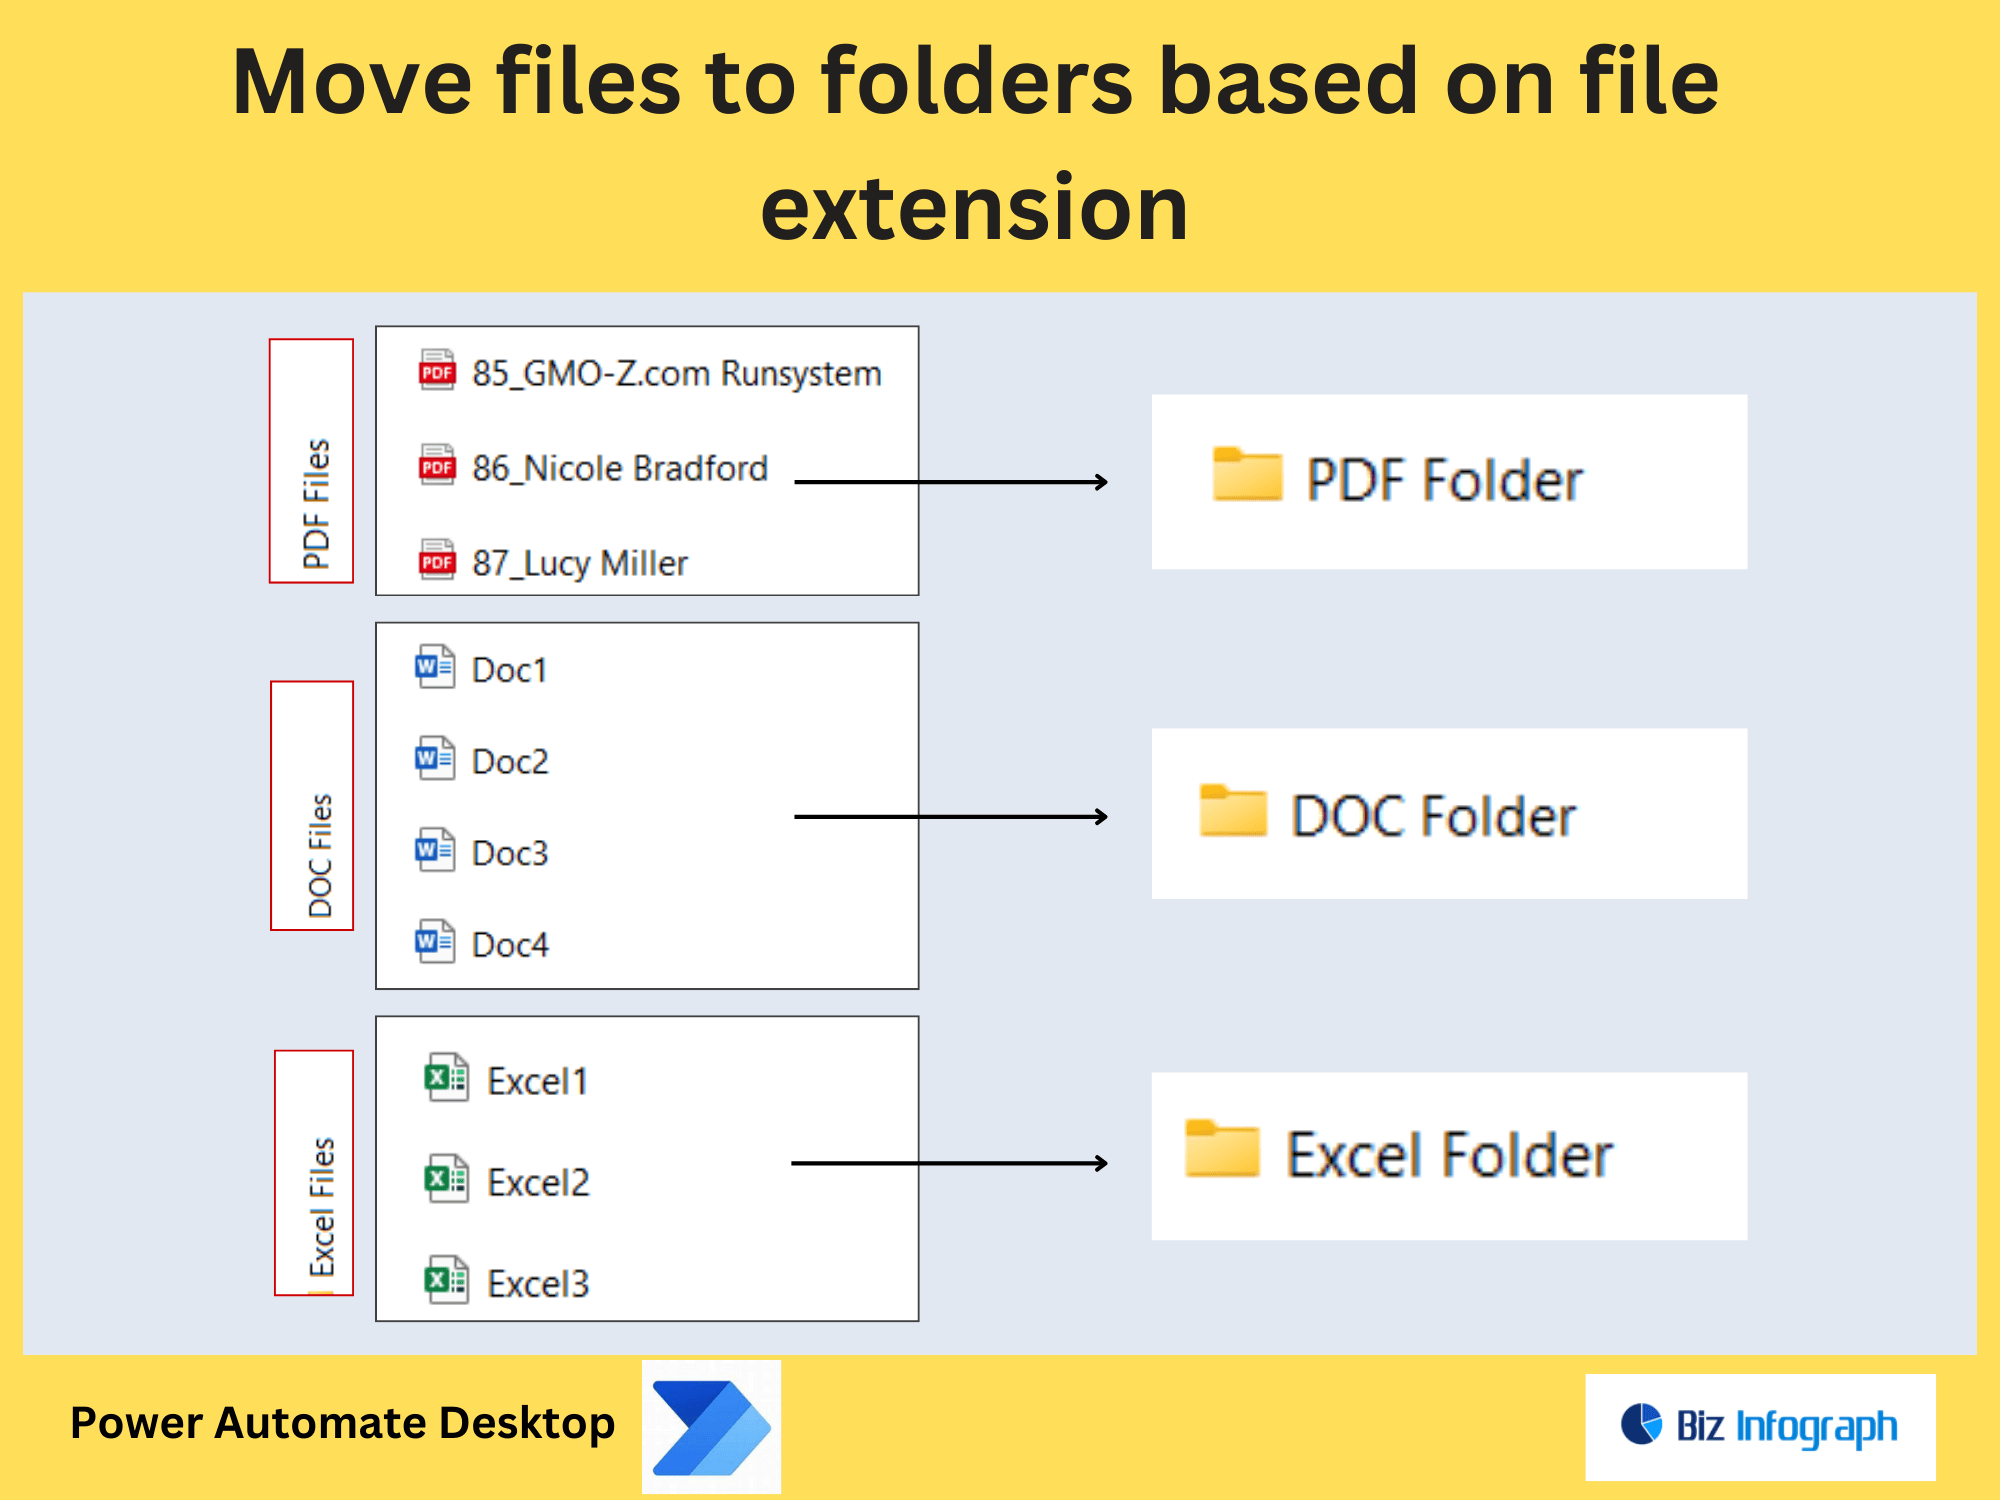
In today’s digital workspace, organizing files from one folder to another manually can be time-consuming and error-prone, especially when dealing with large volumes of data. Businesses often need to move files in SharePoint or other platforms based on file extensions, such as grouping PDFs, Excel sheets, or images into specific folders. Automating this process using Power Automate eliminates the need for manual intervention, ensuring that files are sorted efficiently. Whether you’re managing a document library or a SharePoint folder, automating file movement helps maintain a clean and organized folder structure, saving time and improving productivity.
Benefits of Using Power Automate for File Management
Using Power Automate to move files based on file extensions offers numerous advantages. It streamlines workflows by automatically sorting files into designated folders, such as subfolders for PDFs, Excel files, or images. This automation reduces the risk of errors and ensures consistency across your folder structure. Additionally, Power Automate integrates seamlessly with platforms like SharePoint, enabling advanced file management scenarios. For example, you can use expressions to filter files by extensions or metadata, ensuring that only relevant files are moved. This approach is ideal for businesses looking to enhance their automation capabilities and improve overall file organization.
How to Move Files to Folders with Power Automate
Setting Up Power Automate for File Movement
To begin moving files from one folder to another, set up a Power Automate flow. Start by selecting a trigger, such as when a file is created or modified in a SharePoint folder. Use the “Get Files” action to retrieve the files you want to move. Next, configure the flow to filter files based on their extensions, such as .pdf, .xlsx, or .png. Power Automate allows you to specify the destination site or target site where the files will be moved. By setting up the flow correctly, you can ensure that files are automatically sorted into the appropriate folders, improving your folder structure and workflow efficiency.
Creating Folders Based on File Extensions
Before moving files, ensure that the destination folders exist. Use the “Create Folder” action in Power Automate to generate subfolders based on file extensions, such as “PDFs,” “Excels,” or “Images.” This step ensures that files are organized systematically. For example, if a file with a .pdf extension is detected, the flow will create the folder named “PDFs” if it doesn’t already exist. By automating folder creation, you can maintain a clean and organized folder structure without manual intervention. This approach is particularly useful for businesses that handle large volumes of files and need to sort them efficiently.
Step-by-Step Guide to Move Files by Extensions
Extracting File Information and Identifying Extensions
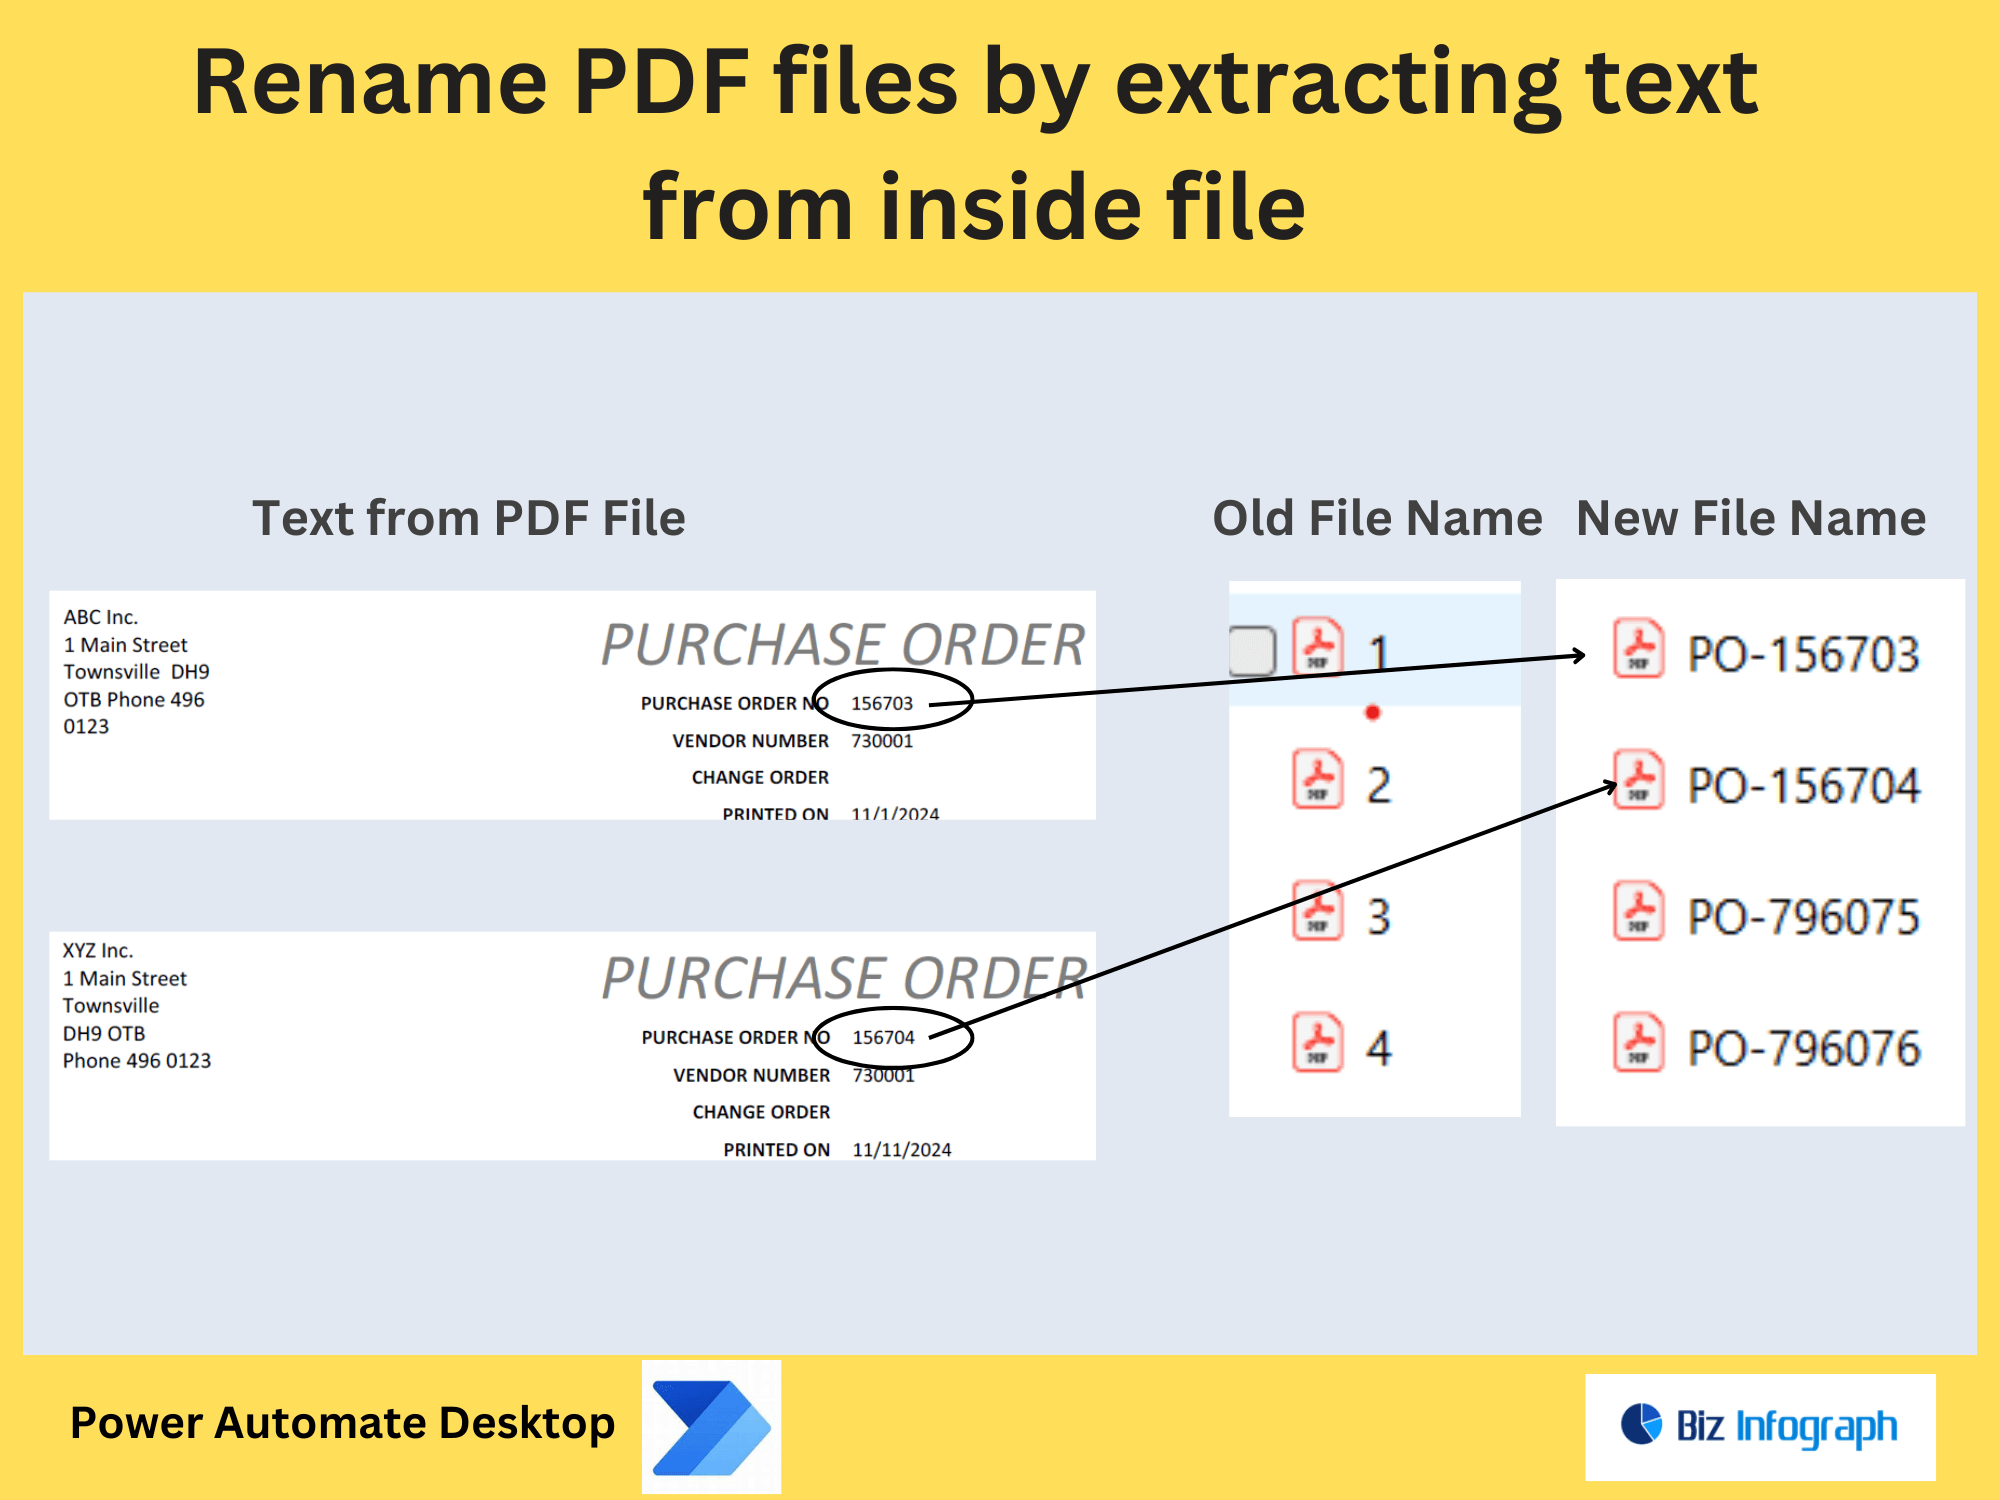
The first step in moving files is to extract file information, such as the file name and extension. Use the “Get Files” action in Power Automate to retrieve files from the source folder, such as a SharePoint folder or document library. Then, use expressions to identify the file extensions. For example, you can use the “Filter” action to separate files with .pdf, .xlsx, or .png extensions. This step ensures that only relevant files are processed and moved to the appropriate folders. By accurately identifying file extensions, you can ensure that the flow to move files runs smoothly and efficiently.
Configuring the Flow to Move Files to Folders
Once file extensions are identified, configure the flow to move files from one folder to another. Use the “Move File” action to transfer files to the designated subfolders based on their extensions. For example, PDFs can be moved to a “PDFs” folder, while Excel files are moved to an “Excels” folder. Power Automate allows you to specify the destination site or target site for the files, ensuring they are placed in the correct location. Additionally, you can use metadata or tags to further categorize files during the movement process. This step ensures that files are organized systematically and efficiently.
Testing and Verifying the File Movement Process
After configuring the flow, test it to ensure it functions as intended. Run the flow with a few sample files to verify that they are moved to the correct folders. Check the folder structure in the destination site to confirm that files are sorted accurately. Power Automate provides a transcript of the flow, allowing you to track the progress and identify any issues. If the flow fails, review the description and adjust the configuration as needed.
Advanced Tips and Next Steps
Optimizing the Workflow for Large-Scale File Management
For businesses handling large volumes of files, optimizing the Power Automate workflow is essential. Use actions like “Apply to Each” to process batch files simultaneously. Additionally, consider using expressions to dynamically create subfolders or sort files based on additional criteria, such as metadata or tags. By optimizing the workflow, you can ensure that the file movement process is efficient and scalable. This approach is ideal for businesses that need to manage entire folders or document libraries with thousands of files.
Integrating Power Automate with Azure for Enhanced Functionality
To further enhance your file management capabilities, consider integrating Power Automate with Azure. Azure provides advanced features like API integrations and HTTP connectors, enabling you to automate complex workflows. For example, you can use Azure to transfer files between cloud platforms or apply permissions to specific folders. Additionally, Azure’s batch processing capabilities can handle large-scale file movements efficiently. By integrating Power Automate with Azure, you can create a more robust and versatile solution for managing files based on extensions, ensuring that your workflows are both efficient and scalable.
Next Steps and Additional Resources
After mastering the basics of moving files with Power Automate, explore additional resources to enhance your skills. Platforms like Microsoft official documentation and community forums offer tutorials and templates for advanced workflows. You can also experiment with actions like “Copy File” or “Translate” to expand the functionality of your flows. By taking these next steps, you can continue to improve your automation skills and make the most of Power Automate for all your file management needs.
For ready-to-use Dashboard Templates:
- Financial Dashboards
- Sales Dashboards
- HR Dashboards
- Data Visualization Charts
- Power BI - Biz Infograph